Recording presentations on Mac can be incredibly helpful, whether you're preparing for an important meeting, creating training materials, or simply wanting to share content with others who can't attend live. Additionally, recording your presentation ensures everyone can access the information on their own time. This article provides a few effective tools to make this process easy. First is the PowerPoint's built-in recorder, which lets you capture slides and narration. Alternatively, Aqua Demo, a screen recording software, offers advanced options like customizable screen captures and annotation tools, providing flexibility for professional-looking presentations. These tools help you to record presentation on Mac straightforwardly, clearly, and effectively.
| Sections | Brief Information |
|---|---|
| Use PowerPoint Built-in Recording Feature | Utilizing PowerPoint's built-in recorder to record presentation on Mac Learn More |
| Best Way to Record Presentation on Mac | Advanced screen recording tool to capture PowerPoint presentation on Mac Learn More |
| Comparison of the Two Methods | Comparing the two methods with specific features Learn More |
| Frequently Asked Questions | FAQs that are commonly encountered about recording PowerPoint on Mac Learn More |
| Conclusion | Recap of the methods discuss in this article Learn More |
Use PowerPoint Built-in Recording Feature
Microsoft PowerPoint is a widely used tool for creating and presenting slideshows. It is part of Microsoft Office Suite that lets you create slides with text, images, charts, and multimedia elements. One of the useful features of PowerPoint is its built-in recorder. This feature allows you to record PowerPoint presentation with audio and video Mac with narration. Additionally, it lets you annotate slides during the recording to highlight key points. In fact, you can convert PowerPoint to MP4 after the recording. However, if you don’t have PowerPoint, you’ll need to purchase it or subscribe to Microsoft 365 to use it.
How to Record a PPT Presentation on Mac:
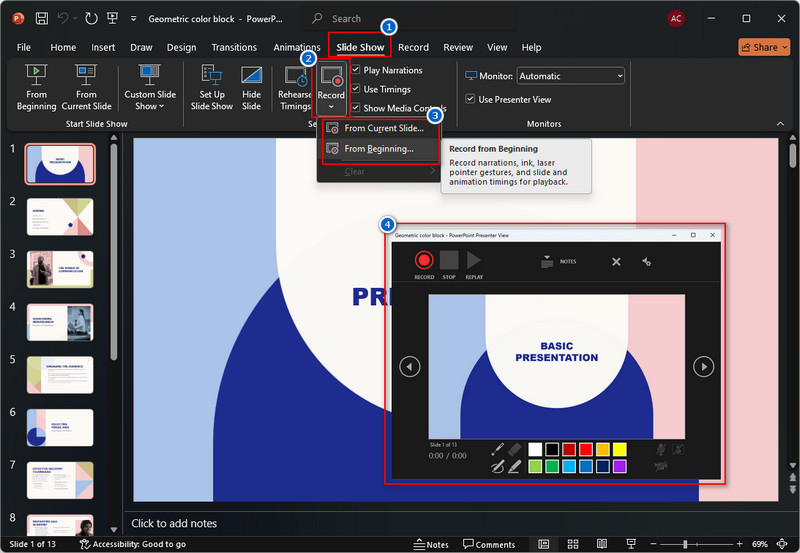
- First, launch Microsoft PowerPoint on your Mac and open the presentation you want to record. Next, navigate to the Slide Show tab at the top of the screen and select Record Slide Show. After that, you will be provided with two options: Start Recording from the Beginning and Start Recording from the Current Slide.
- Choose your preferred recording option. Before recording, you can enable some options, such as narration, laser point, animation timings, etc. Then, hit Start Recording, and PowerPoint will begin recording your slide presentation. While recording, you can speak as you go through the slide using their on-screen tools.
- Once the presentation ends, click Stop Recording on the toolbar. Then, navigate to the Slide Show tab again and click Play from Start to review your recording. If satisfied, export the recorded presentation as a video. Simply go to the File tab and select the Export option. Next, choose your preferred format and save.
Record Slide Show updates!
We’re making updates to enable users to record presenter video and ink during Record Slide Show sessions. These new capabilities will enable you to create more robust recorded presentations, simplify your recording process and better engage your audience.
Best Way to Record Presentation on Mac
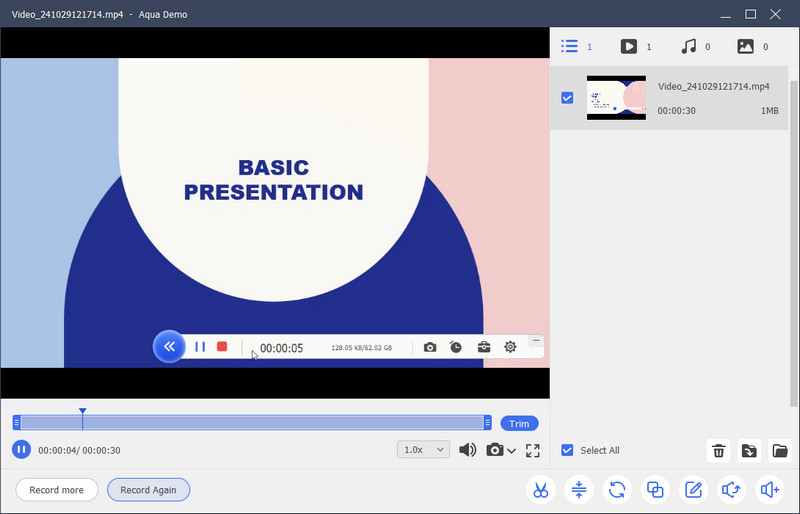
If you prefer the most advanced recording tool to record your PowerPoint presentation, then go for Aqua Demo. It is a reliable screen recording tool that captures any activity on your computer screen. These activities are tutorials, music videos, slideshows, and more. Also, it allows you to record slideshows in various resolutions, such as 720p, 1080p, and even 4k. Furthermore, this screen recorder lets you record Mac screen with audio both internal and microphone, as well as a webcam. This is useful when recording a presentation and adding personal commentary or explanations. Besides, Aqua Demo is the perfect tool for you because it is easy to use, no need to purchase a subscription plan compared to PowerPoint’s built-in recorder, and it provides basic editing tools. Follow the guide below on how to record a PowerPoint presentation on a Mac.
Step 1. Install the Recording Tool
First, you must install the Aqua Demo on your Mac computer. To get the installer file, click the download button presented above. Once downloaded, locate the file and follow the on-screen wizard prompts to start the installation process. After installation, the recording tool will launch automatically.
Step 2. Prepare the Presentation
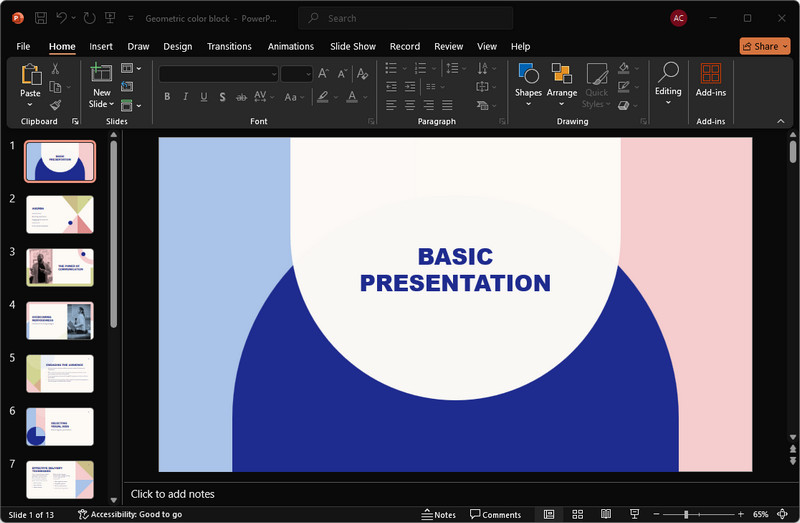
Next, open the Microsoft PowerPoint app and prepare the PPT slides you want to record. You can double-check the slides or read them again to ensure smooth recording and explanation later. If you're satisfied, you can now set the recording.
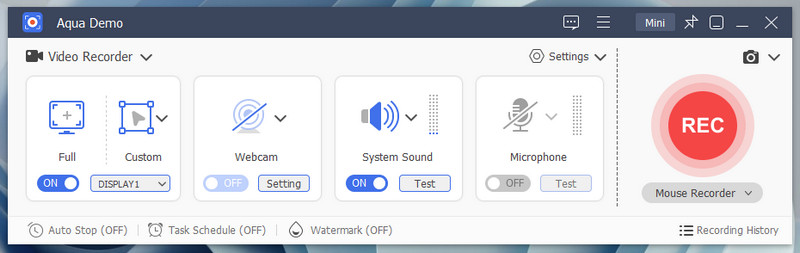
Step 3. Set the Recording
Navigate to the recording tool again and set the recording area you prefer, whether it's full screen, partial screen, or custom screen. Then, enable both the microphone and the webcam to capture yourself. After that, test your microphone to see if it's working, and place the face camera on the PowerPoint that doesn't block the text or slides.
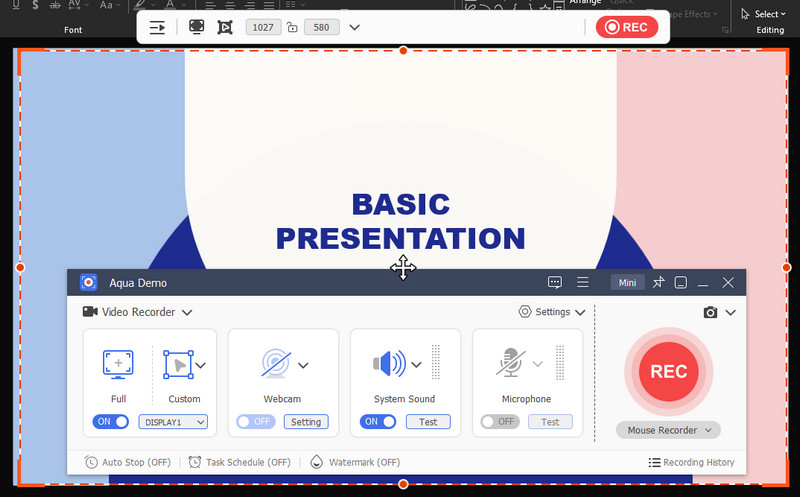
Step 4. Start Recording the PPT
Once all set, click the start recording icon and begin presenting your PowerPoint. You can utilize the annotation tools to highlight important notes on your slides. Once the presentation is done, click the Stop icon and preview the recorded slides. Finally, you can share it with everyone since our tool automatically saves it on your computer files.
Comparison of the Two Methods
Here's a comparison of PowerPoint's built-in recorder and Aqua Demo for recording presentations on a Mac:
| Features | PowerPoint Built-In Recorder | Aqua Demo |
|---|---|---|
| Ease of Use | Simple, integrated directly in PowerPoint | User-friendly with easy setup and options |
| Recording Area | Full screen only | Customizable (full screen, partial, or custom) |
| Webcam Support | Supported | Fully supported |
| Best Suited For | Presentations or slideshows within the tool | High-quality presentations, tutorials, and more |
| Annotation Tools | Laser pointer | Mouse click effects, highlighter, shapes, arrows, and lines |
Frequently Asked Questions
How to record a presentation on Mac?
We have two methods for easily recording a PowerPoint presentation on a Mac. The first is PowerPoint's built-in recorder, and the other is a third-party tool, Aqua Demo. Both recording tools can easily record a presentation, but if you want an advanced recording tool, try Aqua Demo.

Why is PowerPoint not recording audio on Mac?
PowerPoint may not record audio on Mac for several reasons. First, the microphone settings might be incorrect or muted, preventing it from capturing sound. Additionally, there could be permission issues, such as PowerPoint not having access to your microphone in the Mac settings.
How do you make a recorded PowerPoint presentation into a video on Mac?
To convert your recorded PowerPoint presentation into a video on Mac, open your presentation and go to File > Export. Choose the video format you want, like MP4, and adjust any settings, such as video quality or timing. Once you click Export, PowerPoint will create a video file of your presentation that you can share or upload.
Conclusion
In conclusion, recording presentations on a Mac can be done using several tools, including PowerPoint's built-in recorder and Aqua Demo. PowerPoint is a great choice for casual users who want a quick and straightforward way to record yourself on Mac while presenting. However, Aqua Demo is a better option for those needing higher quality and more features. Each tool has its strengths, so choosing one that fits your needs is essential. Don't be afraid to experiment with different recording options to see which works best for you. You can find the perfect way to capture and share your presentations effectively by trying out various tools!