On This Page
SuperBox has become one of the most popular streaming devices for watching TV shows, live sports, and movies at home. It runs on an Android-based system, giving users access to thousands of apps and channels through a simple, remote-controlled interface. Many people enjoy its comprehensive variety of content; however, a common question is whether you can record directly on SuperBox. In fact, SuperBox itself does not include a built-in screen or video recording feature. As a result, this can be frustrating for users who want to preserve their favorite shows or keep recordings for offline viewing later. Moreover, recording is important because it allows you to enjoy programs without relying on internet speed. It also helps you archive moments you don't want to miss. Thus, in this article, we will explore simple and practical ways to record on SuperBox. Specifically, we'll cover methods using a video capture card, DVR devices, and certain SuperBox apps with built-in recording functions.
Utilizing a Video Capture Card with a Computer
Connecting the SuperBox on a Capture Card
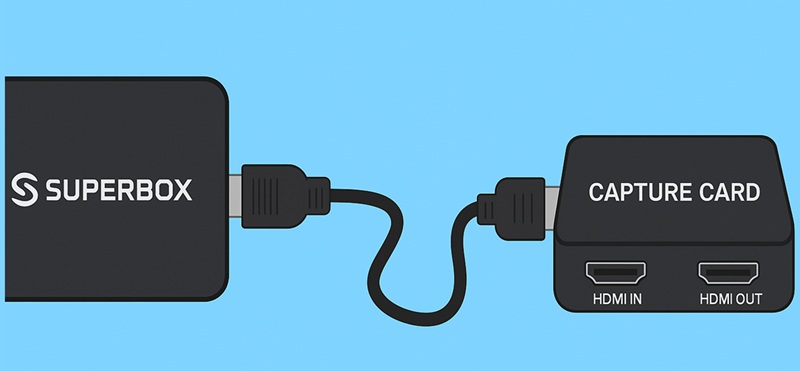
A video capture card is an instrument that allows you to transfer video from one source, such as your SuperBox, to your computer. It works by connecting your SuperBox via an HDMI cable to the capture card, which is then plugged into one of your computer's USB or PCIe ports. This setup allows you to record SuperBox and save the stream directly to your computer. We provided the steps below on how to connect your SuperBox to a video capture card.
Step 1: Connect SuperBox to the Capture Card
First, plug the HDMI output of your SuperBox into the HDMI input port of the capture card. This connection permits the video and audio signals from SuperBox to pass through the device. If your capture card has an HDMI output, you can also attach it to a TV or monitor for real-time viewing while recording.
Step 2: Attach the Capture Card to Your PC
Next, use the provided USB cable to connect the capture card to your computer. Once connected, your computer will detect the capture card as a video input device. After installation, you can now access the recording software you want to use to record your favorite SuperBox show or movie.

Record SuperBox Content with a Professional Screen Recorder
Once your capture card and computer are set up, you will need a reliable screen recorder to record your SuperBox content. That being said, we will use Aqua Demo. This tool is one of the most reputable software applications for recording and sharing videos. This screen recorder allows you to record TV on a PC and capture any activity on your screen. In line with this, it will enable you to record the video and audio from your SuperBox. Aside from SuperBox, it also allows you to record streaming content from platforms such as Netflix and Hulu, offering a versatile tool for digital media archiving.
Moreover, the recorded files are saved in high-quality formats, such as MP4, MOV, AVI, and others, ensuring optimal playback fidelity for later viewing. Additionally, it features a "Task Scheduler" that allows for automated recording at specified times, making it particularly useful for capturing live broadcasts. The tool supports HD and even 4K screen recording, allowing you to capture videos with excellent detail and vibrant color accuracy. However, the free option includes watermarks on your recordings. The section below will show you how to produce a high-quality SuperBox recording with Aqua Demo.
Step 1: Install SuperBox Recorder
To begin, download and install the Aqua Demo software onto your personal computer. Clicking any of the download buttons above will allow you to save the file installer for the screen recorder. Then, proceed with the installation process by following the on-screen instructions, which typically involve accepting the license agreement and selecting an installation directory.
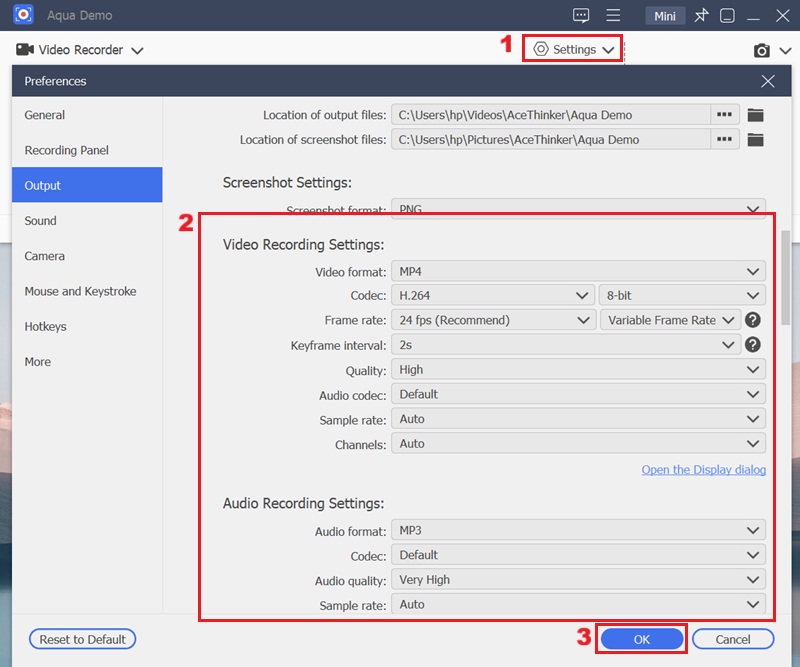
Step 2: Configure the Recording Settings
Upon successful installation, launch Aqua Demo and access the recording settings by hitting the gear icon on the screen recorder's interface. After that, you can configure various parameters such as video resolution, frame rate, output format, and audio input to optimize your recording quality. Once you have adjusted these settings to your preference, hit the "OK" button to save the changes.
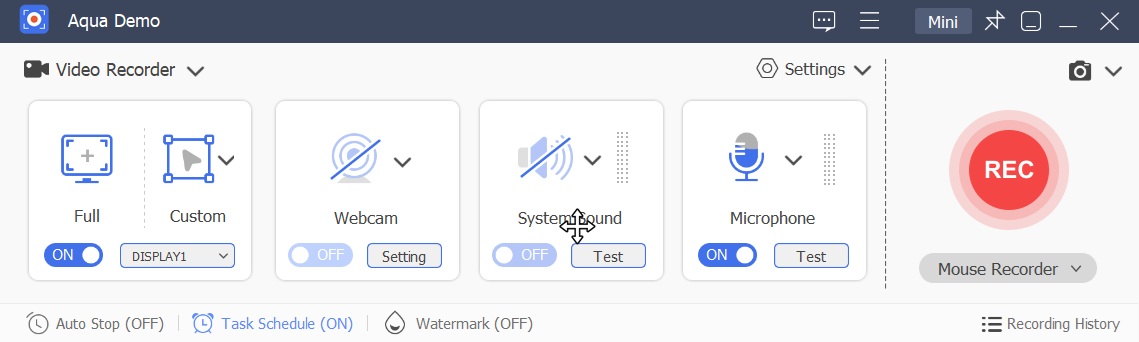
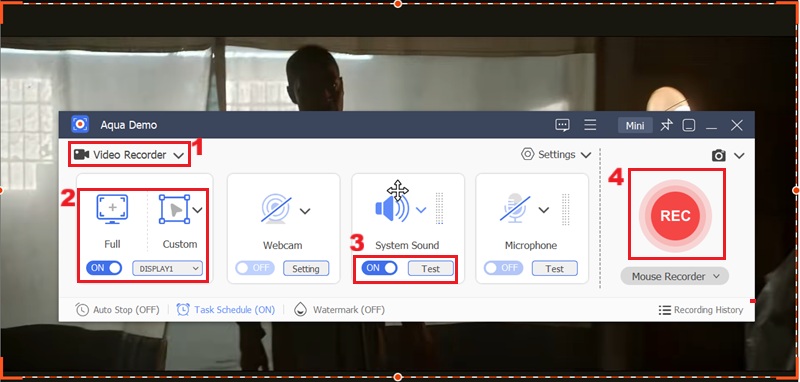
Step 3: Record SuperBox Content
Next, open the SuperBox application or channel you wish to record, then in Aqua Demo, select the "Video Recorder" option. After that, choose your recording region to capture the SuperBox content and toggle the system audio to ensure that the sound is captured. Finally, initiate the recording by clicking the "REC" option.
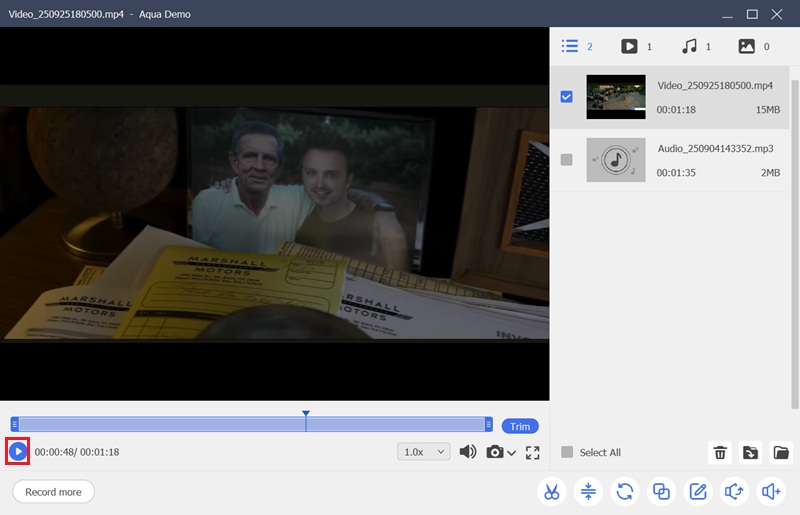
Step 4: Save and Preview SuperBox Recording
Once the SuperBox recording is complete, click the "Stop" red button, and the recorded SuperBox video will automatically appear in the recording list. Here, you can click the "Play" option to preview the SuperBox recorded content. You can now enjoy your recorded SuperBox programs at your leisure, even without an internet connection.
Capture SuperBox Content Online
Suppose you don't want to download and install additional software, then you can utilize an online screen recording tool. This browser-based recorder application provides a convenient alternative for capturing SuperBox content directly through your browser. With this online recorder, you can record SuperBox content in 1080p high definition. Furthermore, you can choose to record the entire screen, a Chrome tab, or a specific window. This gives you the flexibility to tailor your capture precisely to your desired content. It also records the audio from your system, providing that both visual and auditory elements of your SuperBox stream are preserved during the recording process. In addition, you can also record other content from various streaming platforms, including YouTube TV, Hulu Live, and more. Let's explore how you can record SuperBox with this online tool.
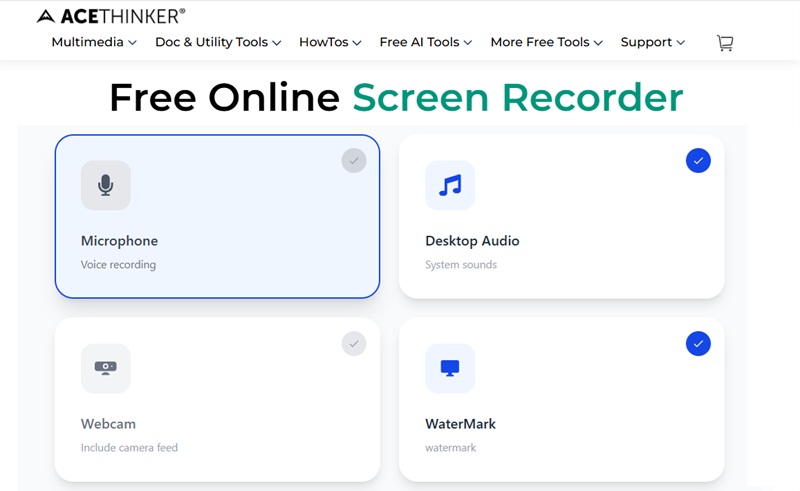
Step 1: Access the Online Recorder
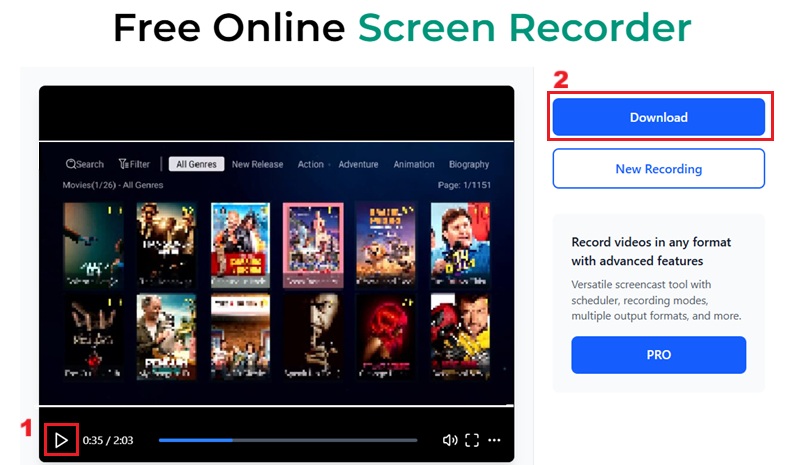
The first step involves navigating to the designated website of the online screen recording tool. You can access the screen recorder on your web browser by searching for the official AceThinker Free Online Screen Recorder. Then, you will see the intuitive user interface of the screen recorder.
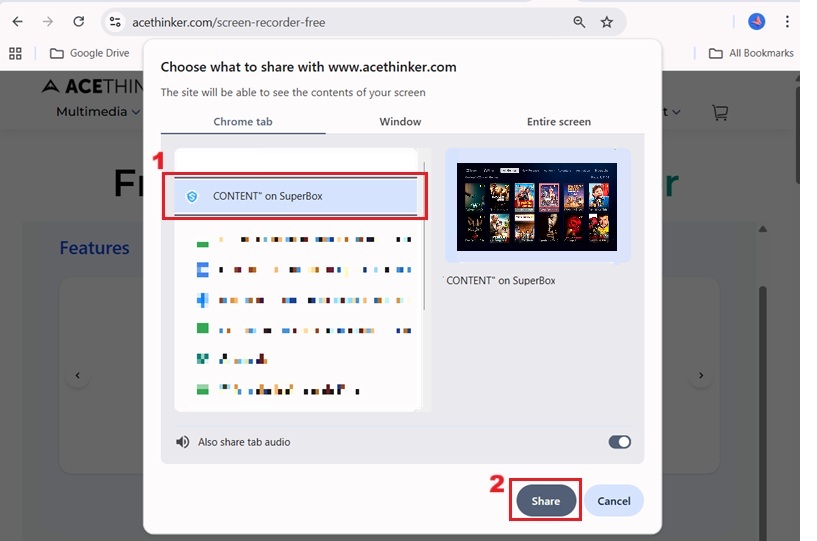
Step 2: Start Recording
Since your SuperBox is already connected to your computer, you can easily access and open the content you want to record. Once you have opened the SuperBox content on your computer, click the "Start Recording" option of the online screen recorder. Afterward, select the window or tab where you have played the content and click the "Share" option to start the SuperBox recording.
Step 3: Play and Download SuperBox Content
Once you're done recording, click the "Stop Sharing" option. Then, you will be redirected to the preview window. Here, you can hit the "Play" icon to see your recorded SuperBox content. Then, click the "Download" option on the right-hand side of the window to save your SuperBox content to your computer.
Employing a Digital Video Recorder (DVR)
The next option for capturing SuperBox content is to utilize a DVR. A digital video recorder, or DVR, captures video and stores it on local storage devices. Unlike screen-capture software, which mainly records what is shown on a computer screen, DVRs are actual devices made to directly connect with broadcast signals. A DVR makes it easy to pause, rewind, and record shows without relying on a live broadcast or an internet connection. In line with this, the most popular DVR options available are TiVo Edge, Nuvyyo Tablo, and Channel Master DVR+. To utilize these tools, you will need the appropriate equipment, including a DVR device, an HDMI cable, and optional external storage. You can set up these tools to record content from your SuperBox by following the guide below:
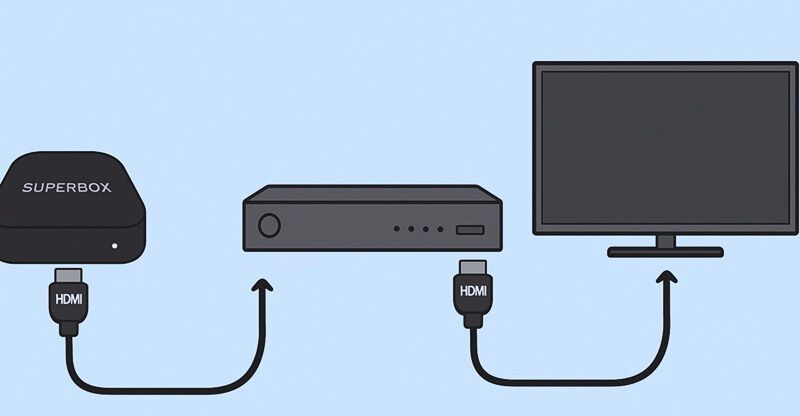
Step 1: Connect SuperBox to the DVR
First, plug the HDMI cable from your SuperBox's output port to the DVR's input port. This feeds the SuperBox video and audio into the DVR, allowing it to record the stream. Afterward, connect the DVR's HDMI output to your TV so you can watch SuperBox live shows or recorded content.
Step 2: Prepare Storage and Power on Devices
Next, insert the external USB drive or ensure the DVR's internal storage has enough free space for recordings. Then, power on the SuperBox, DVR, and TV, and follow any on-screen prompts to initialize the DVR and format the drive if required. Once formatted, the DVR will report available recording space and be ready to schedule or start SuperBox recordings.

Step 3: Configure Recording Settings and Start Recording
After that, open the DVR menu and select the input/source that corresponds to the SuperBox HDMI connection. Then, set the recording quality and storage preferences. Subsequently, navigate to the specific SuperBox content you wish to record, and use the DVR's record button to start recording a live show. Finally, verify the recording by playing a short segment from the DVR library to confirm audio and video were captured correctly.
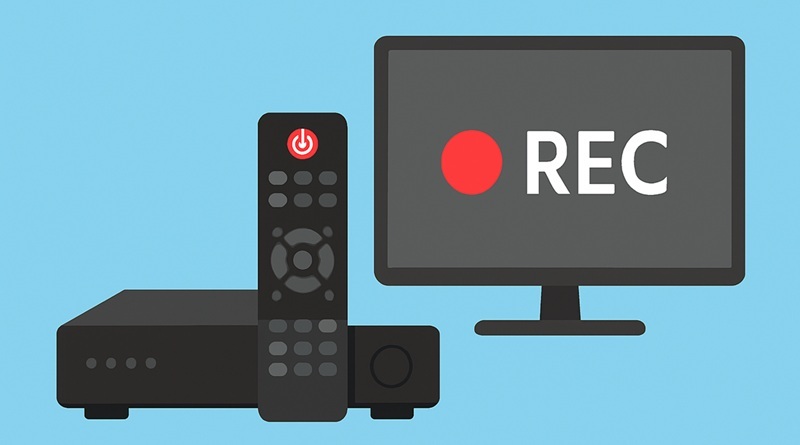
"DVR records video to local storage devices"
DVR can record analog video sources on-site or capture video from digital sources.
Utilizing Built-In Recording Feature in Certain SuperBox Apps
Another way to record on SuperBox is to utilize the integrated recording functionalities present within specific applications available on the SuperBox platform. Some SuperBox apps, such as BlueTV or BlueVOD, include a built-in option to record shows or movies. This feature enables users to save content directly to a connected storage device, typically a USB drive. This process eliminates the need for external DVRs or screen recording software, significantly simplifying the capture workflow. SuperBox may not officially refer to this feature as a “PVR.” Still, it functions similarly by allowing you to record live channels directly onto a USB drive using your remote. You can refer to the process below for guidance on setting up and utilizing this integrated recording capability effectively.
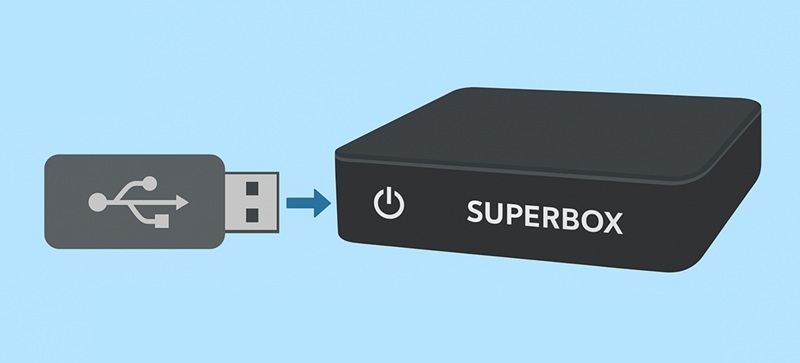
Step 1: Plug in a USB Drive
To begin the process, insert a USB drive into the SuperBox’s USB port. This will serve as your storage for the SuperBox recordings. Ensure the drive has sufficient free space to save your favorite SuperBox shows. Once connected, the SuperBox will automatically recognize the drive.
Step 2: Open the App with Recording Option
Launch an app on your SuperBox that supports recording, such as BlueTV or BlueVOD. Look for the record button or menu option inside the app. Look for the record button or menu option inside the recording app. With a few clicks, you can set up your recording preferences.
Step 3: Select and Record Your Show
After that, browse the SuperBox app and select the TV show, movie, or sports event you want to save. Simply press the “Record" button to initiate capturing the content onto your USB drive. Once the recording finishes, you can playback the recorded SuperBox content directly from the drive at any time.
| Method | Best For | Effectiveness | Ease of Use |
|---|---|---|---|
| Video Capture Card + Computer | Users who want high-quality recordings and editing flexibility | Very effective (HD/4K capture possible | Easy |
| Digital Video Recorder (DVR) | Recording live TV channels without a PC | Effective – reliable for live content | Moderate |
| Built-in App Recording (BlueTV/BlueVOD) | Quick, simple recordings directly from apps | Effective but limited to supported apps | Easy |
Frequently Asked Questions
Can I record shows or movies on SuperBox?
Yes, you can record shows on SuperBox. This can be achieved through various methods, including screen-capture software, external digital video recorders, or utilizing the built-in recording functionalities of SuperBox apps. However, please note that the availability and functionality of these recording options can vary depending on the specific SuperBox model and the applications installed on it.

Is SuperBox legal?
The device itself is not illegal, but its use becomes questionable when it is utilized to access copyrighted content without proper licensing. This is particularly relevant for “TV boxes” that enable the viewing of international television channels. Therefore, users should exercise caution and assure they comply with all appropriate copyright laws and terms of service when utilizing the SuperBox device.
Can you pause a live streaming on SuperBox?
Yes, many SuperBox applications that stream live content offer a pause function, enabling users to halt playback temporarily. You can then resume watching from the paused moment, effectively. This feature is mainly practical for users who need to momentarily step away from streaming television or other media, providing a more flexible viewing experience.
Conclusion
Despite SuperBox's lack of an in-built recording feature, there are still useful methods to preserve your preferred SuperBox television series and films. You can use a DVR device or use the recording features included in some SuperBox apps. You can also employ a video capture card with a reliable recording software like Aqua Demo. Since each of the methods mentioned above has a different setup procedure, it is recommended that you select the one that best suits your specific needs. Moreover, remember to abide by copyright regulations and only record SuperBox content for your own personal use. Lastly, feel free to share your tips and experiences about recording on SuperBox.