As the demand for high-quality content creation increases, recording internal audio on Macs has become increasingly important. Having the right tools is essential to create tutorials, capture audio from streaming services, or record system sounds for various projects. Recording internal sound on a Mac can be challenging because system restrictions prevent direct sound recording through the computer's speakers. This limitation is in place to protect users' privacy and prevent unauthorized access to audio data. However, third-party applications and workarounds can enable you to capture internal audio on a Mac, although they may require additional configuration and setup. From professional-grade tools to user-friendly applications, discovering the right approach can significantly improve your audio recording quality. Read on to find the best tools and processes to record internal audio Mac and elevate your content creation capabilities.
| Section | Brief Information |
|---|---|
| Aqua Demo | Detailed guide of recording internal audio on Mac with a professional tool Learn More |
| QuickTime Player | Steps in using built-in tool for Mac in capturing internal audio Learn More |
| Audacity | Simple guide in utilizing Audacity to capture Mac's system sound Learn More |
| OBS Studio | Easy steps to record Mac system audio using an open-source app Learn More |
| Voice Memos App | A beginner's guide to recording Mac system audio with built-in voice recorder Learn More |
| MP3 Audio Recorder | Steps in to capture sound from your Mac's system with simple tool Learn More |
| Audio Hijack | Hassle-free guide to capture audio on Mac using an advanced software Learn More |
| Tips in Choosing the Suitable Audio Recorder | First hand tips and suggestions in deciding for the best Mac internal audio Learn More |
| Frequently Asked Questions | Common questions with helpful answers about recording internal sound on Mac computer Learn More |
| Conclusion | Complete summary to make informed decision in recording audio on Mac Learn More |
Aqua Demo
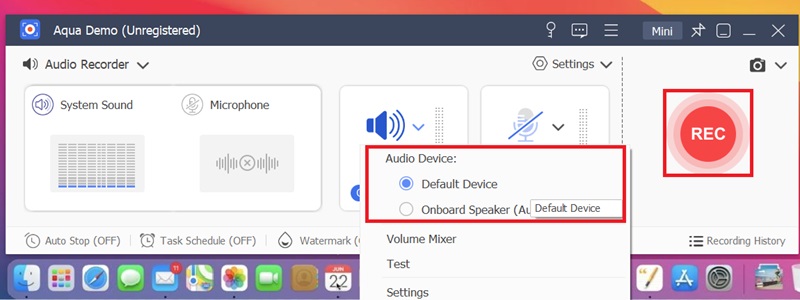
Aqua Demo is an effective tool to record screen with audio. Unlike other software, Aqua Demo can record internal audio without needing a third-party app. This tool captures Mac’s system sound, external audio from a microphone, and even with a screen simultaneously. In addition, it supports various audio formats, including MP3, WMA, AAC, WAV, FLAC, and more. Furthermore, Aqua Demo also features a “Task Schedule” that lets you set up a recording task to automatically start and stop as long as your Mac is open. What makes it stand out from other tools is that you can test the audio source before recording to see if it can detect it. Follow the steps below to learn how to use Aqua Demo to record internal audio on your Mac.
Step 1. Get the Mac Audio Recorder
The first step is to click the right-side “download” button above that, which is meant for macOS since we will record the Mac computer with internal audio. Then, follow the instructions on the setup window to install the tool on your Mac computer smoothly. Afterward, the Aqua Demo will be started to access its recording interface.
Step 2. Modify the Output Settings
Then, hit the “Gear” icon on the top-right corner to access the tool’s settings. After that, modify the audio recording and sound settings according to your requirements. You can change the audio format, codec, quality, test the system sound, and more. Once finished, save the changes.
Step 3. Begin Recording Mac’s Internal Audio
Once everything is set, click the “drop-down” menu beside “System Sound” and select “Default Device” from the options. Then, hit the “Rec” button on the right section to begin the audio recording after the countdown. Make sure that you are only recording one audio at a time to avoid mixing them.
Step 4. End and Save the Audio
If you want to end the audio recording, click the "Stop" button from the toolbar. Then, you can manage the recording in the preview window. Here, you can play, trim, or edit the recording's metadata and record. Finally, click the "Export" button on the lower-right corner to save the audio recording on your Mac computer.
QuickTime Player
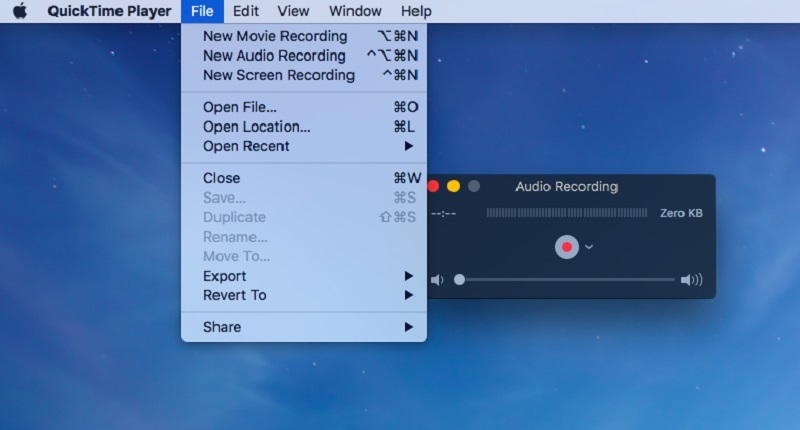
You likely know QuickTime Player as the built-in audio and video recorder on every Mac, but it can do much more. QuickTime Player is perfect for recording system audio for tutorials or hacks. It also functions as an audio player, virtual reality tool, image viewer, and movie player. However, it doesn't support direct internal audio recording without additional software. You’ll need to download Soundflower, a free add-on. With QuickTime and Soundflower, you can record audio from YouTube on Mac or any activities on your Mac screen and save them in various video formats like AVI and MP4. Here are the steps to record internal sound Mac using QuickTime Player.
- Open QuickTime Player on your Mac and play the audio you want to record. Click "File" in the top menu and select New Audio Recording from the drop-down. In "New Audio Recording," choose your audio source, either the internal microphone or any external microphone.
- Note that QuickTime primarily records from external sources and doesn't support direct internal audio recording. You need to connect to Soundflower for the recording. On the "New Audio Recording" page, click the "Record" button and select your source.
- Then, start capturing by clicking the "Record" button in the floating toolbar. After that, click the "Stop" button to end your recording. Once done, the audio file will be automatically saved on your Mac. Play the recording to check it; if satisfied, save it from the File menu.
Audacity
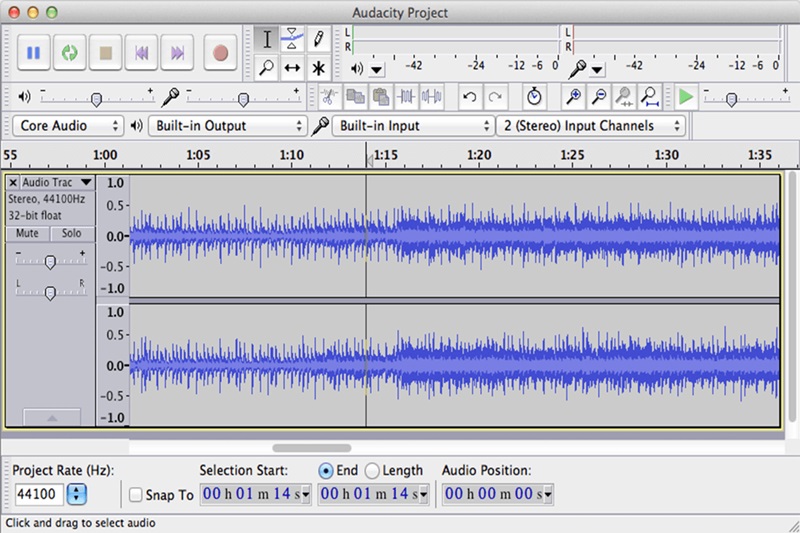
Audacity is a popular cross-platform software that can help you record screen with audio on Mac. It is the right tool for you if you prefer to record audio only. Also, Audacity can capture live audio using a microphone and mixer or digitize recordings from other media. To add more, you can instantly edit the recorded audio with essential editing tools like cutting, copying, pasting, and deleting any parts. After recording and editing, you can export the recordings to audio formats like MP3, M4A, OGG, WAV, and more. Keep in mind that Audacity can record the internal sound of a Mac with the help of Soundflower. Find out how by following the presented tutorial below.
- Go to the Apple menu to launch the “System preferences” and hit “Sound” from the options. After that, choose the “Output” button and set “Soundflower (2ch)” as the audio source.
- When done, launch the “Audacity Preferences” and choose “Soundflower (2ch) as the recording device to record the audio inside an app on your Mac. Next, return to Audacity ’s main interface, hit the “Record” button, and start recording system audio Mac.
- Finally, snap the “Stop” button to complete the recording task. You can export the recorded audio as an MP3 file and save it on your Mac computer.
OBS Studio
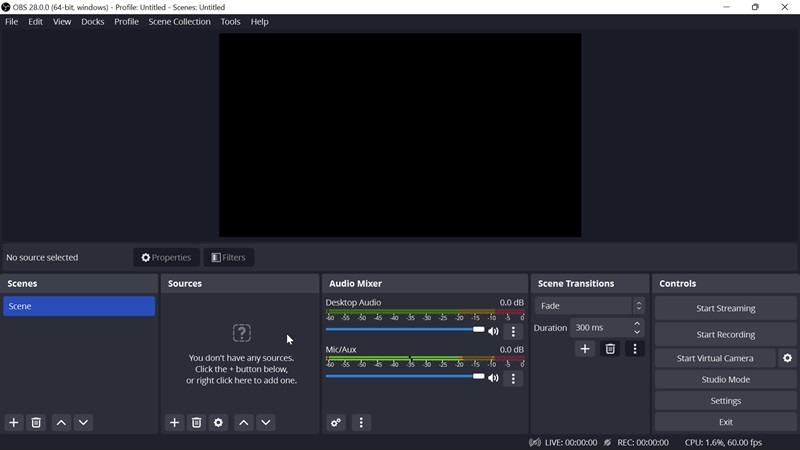
OBS Studio is another tool that you can use to start the Mac screen recording with an internal audio process. This versatile software is jam-packed with features that you can use to enhance your recorded files. Moreover, the tool has an "Audio Mixer" to instantly adjust the noise gate, distortion, and other audio settings. Besides that, you can use OBS Studio to record the screen in HD resolution with audio and stream them afterward using its "Live Streaming" feature. Additionally, you can get a high-level view of your production to monitor eight scenes and transition them quickly. Learn how to use this excellent open-source screen recorder with audio using the steps provided below.
- To start a new recording, create a "New Scene" and give it a name of your choice. Suppose you are ready to arrange your scene. In that case, you can select the media source by clicking "Add a New Source" at the bottom of the OBS Studio and choosing "Audio Output Capture" to record the internal audio.
- Afterward, you can go to "Settings" to customize the formats, compression, resolution, and more. Once you are satisfied, click on the "Start Recording" button at the bottom right corner of the tool and hit the "Stop" button when you are ready to finish the recording.
- The tool will then automatically save your recordings in a new folder containing your "Documents." This convenient feature ensures that your recordings are always secure. You can access them by moving to the "File" menu and hitting "Show Recordings" in the dropdown arrow.
Voice Memos App
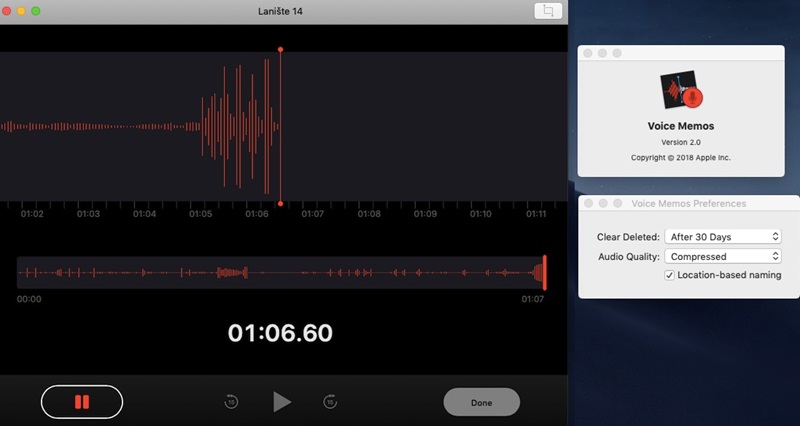
Voice Memos, a free voice recorder for iOS and Mac, is ideal for beginners due to its simplicity and user-friendly design. It offers unlimited recording time, basic editing features, and high-quality audio recording. This makes it perfect for capturing meetings, conversations, ideas, or memos. Additionally, recordings can be saved to iCloud, ensuring seamless access across all your Apple devices. Furthermore, the app allows you to record Apple Music and pinch-to-zoom for precise editing and trim your recordings to save desired portions. Also, you can replace and resume to fine-tune and use "Enhance Recording" to reduce background noise and room reverberation with a single tap. Here’s how to record internal Mac audio.
- First, launch the Voice Memos app from your Applications folder or use Spotlight search to find and open it quickly. After that, hit the red circle record button or use the "Touch Bar" on newer MacBook Pros.
- For the best quality, choose Lossless under 'Preferences' in the 'Voice Memo' menu. Once done, click Pause to pause and Resume to continue recording as needed.
- Next, hit "Done" to stop recording. Play your audio by clicking the triangular play button. Access your recordings for playback or editing within the app, and save them to iCloud for access across your Apple devices.
MP3 Audio Recorder
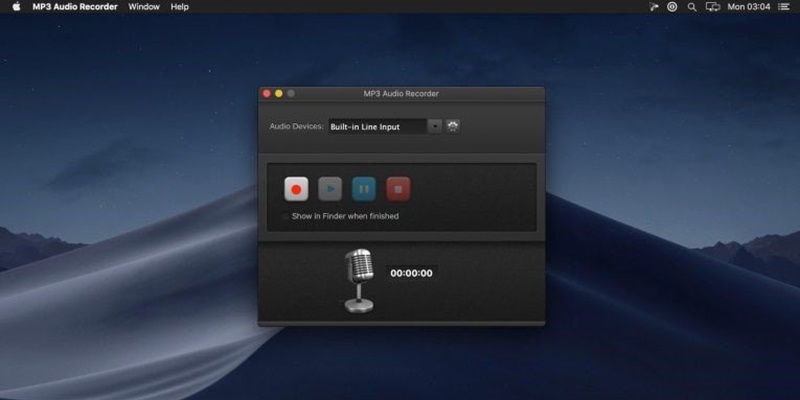
If you want a simple yet useful tool to capture internal Mac audio, you can install the MP3 Audio Recorder. This app simplifies audio recording with extensive customization options, including support for variable and constant bitrate encoding, recording in the popular MP3 format, and external microphone support. It allows you to create new recordings with various customizable options, making it a flexible tool for your audio recording needs. However, note that the tool can only record audio alone and has no option for recording with the screen. To use this audio recorder, follow the simple guide below.
- Begin by installing the MP3 Audio Recorder on your Mac. Follow the installation guide to finalize the setup until you successfully get the app. Afterward, open the MP3 Audio Recorder and tap the drop-down menu next to "Audio Device."
- Select the Soundflower audio recording device to capture sound on your Mac. Then, go to "Settings" to adjust various customization tools according to your preferences.
- Tap the recording icon to start recording internal audio, and tap the "Stop" button when finished. The tool will automatically open the folder with your saved recording. Double-click the file to play it in the MP3 media player.
Audio Hijack
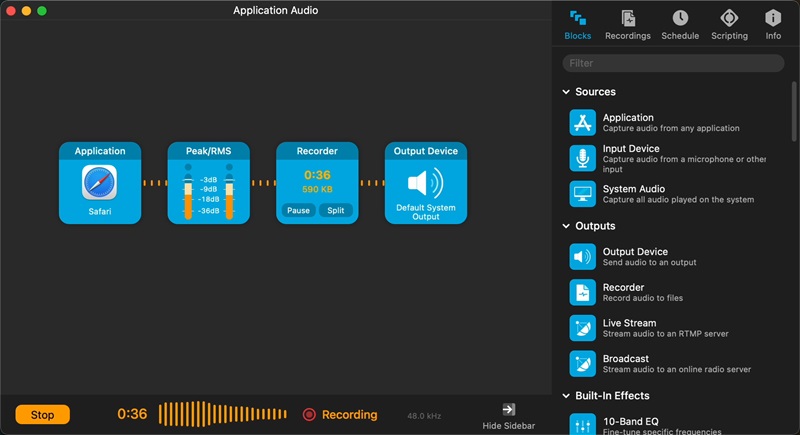
Audio Hijack allows you to record internal audio on Mac from any website or application, capturing all system audio simultaneously. Ideal for podcasts, it supports in-studio recordings with mics and mixers or remote VoIP conversations from services like Skype. Beyond recording, Audio Hijack offers live streaming, internet broadcasting, and audio adjustments for both mics and apps. Enhance sound levels with features like Magic Boost and Volume blocks, which are perfect for small laptop speakers. Additionally, Audio Hijack can capture and record audio from microphones, mixers, and other input devices, making it a versatile tool for any audio need.
- First, navigate to the "Audio Hijack" product page and download the application. Save the file to your preferred download location.
- Go to the folder where the application is downloaded, double-click to start the installation process, and follow the instructions. Once installed, find Audio Hijack in the “Applications” folder and double-click to launch it.
- After that, click the "Record" button in the bottom left corner of the session window to configure your recording settings. Click the same button to start recording, and hit again to stop and save the recording when finished.
Tips in Choosing the Suitable Audio Recorder
Choosing the right audio recorder for your Mac can be daunting with so many options available. Sharing our experience can help others make informed decisions. Here are some tips to guide you:
- Understanding your specific needs is crucial when considering an audio recorder for your Mac. Are you planning to record music, capture lectures, or create internal audio for tutorials? Your intended use will be the compass that guides your choice.
- Experiment with the tools recommended in this article to see which one aligns best with your requirements. Each tool offers unique features that cater to different needs, and your experience with them will be invaluable in making the right choice.
- Pay attention to the audio quality of each recorder. Share your findings on which tool provides the clearest and most consistent recordings.
- Once you've chosen a solution, explain why it stood out. Highlight the key factors influencing your choice, helping others make an informed decision.
Frequently Asked Questions
How can I guarantee the best audio quality when recording on a Mac?
Utilizing high-quality recording software is important to achieve optimal audio quality. To maintain high fidelity, ensure your audio source is set to internal audio and select appropriate audio formats such as MP3 or WAV. Additionally, optimize your system audio settings and ensure that there is minimal background noise to capture clean, clear audio.

What are some common issues with recording internal audio on a Mac?
Common issues with recording internal audio on a Mac include audio quality problems. This can often be resolved using a high-quality virtual audio driver; no sound is recorded. Also, it typically requires verifying that the correct input and output devices are selected in both your system settings and recording software. Software conflicts can also occur, where some audio routing software might conflict with other audio applications or system settings.

Conclusion
Exploring methods to record internal audio on Mac, we've covered various tools like Aqua Demo, OBS Studio, Audio Hijack, QuickTime Player, and more. Each internal audio recorder for Mac offers unique functionalities suited for different recording needs, such as podcasts or tutorials. To maximize your recordings, ensure you choose the right tool based on your audio quality and feature requirements. Optimize settings such as audio inputs and formats for optimal results, and practice using the software to familiarize yourself with its capabilities and troubleshoot any issues. These steps will help you effectively capture high-quality internal audio on your Mac, whether for professional recordings or personal projects.


