On This Page
Google Meet has become one of the go-to tools for online meetings, whether it's for school, work, or catching up with teams remotely. One of its best features is the ability to record meetings, which is perfect for reviewing important discussions, keeping a record, or sharing with those who couldn't join. However, sometimes Google Meet recording unavailable, and you don't know the reason. So, this article aims to help you understand why the recording feature may not be working. We'll walk you through the possible reasons behind it, who is allowed to record in the first place, and how to fix the issue. Plus, we'll share some easy alternative ways to record your meetings if Google Meet isn't cooperating. Let's get started!
| Solution | Effectiveness | Who It's For |
|---|---|---|
| Get a Paid Plan for Google Workspace | 100% | Free account users |
| Check if Recording Feature is Enabled | 90% | School/work accounts |
| Join the Meeting on Your Computer | 85% | Mobile users |
| Record the Meeting Before Presenting | 70% | Presenters in meetings |
| Schedule a Meeting as a Person | 75% | Users using shared calendar resources |
| Contact Customer Support | 80% | Users with account/setup issues |
| Use Third-party Screen Recorders | 100% | Anyone needing a quick workaround |
Common Causes Behind Google Meet Recording Problem
If you're wondering how to record Google Meet but can't find the option, there are several common reasons why this may happen. It's not always a technical error—sometimes, it's just about account settings or who's hosting the meeting. In this section, we'll cover the most common causes, giving you a better understanding of what's happening and what you may need to address.
1. You're Using a Free Google Account
Recording is only available for certain Google Workspace plans. If you're using a personal (free) Gmail account, the recording feature won't be there.
2. Your Admin Hasn't Enabled Recording
For school or work accounts, only the administrator can enable the recording feature. If it's disabled in the admin settings, you won't see the option.
3. You're Not the Meeting Organizer or in the Same Organization
Only the meeting organizer or someone from the same organization is allowed to record. Guests or users from outside the domain usually can't.
4. You're in a Breakout Room
Recording isn't supported in breakout rooms. You'll need to return to the main meeting to record.
5. You're Using Google Meet on Mobile
The mobile version of Google Meet doesn't support built-in recording. You'll need to use a computer to access the feature.
6. Storage Issues in Google Drive
Recordings are saved to Google Drive. If your Drive is full or there are storage issues in your organization, recording might not work.
7. Temporary Glitch or Outage
Sometimes, it's just a minor bug or a temporary issue with the Google Meet service. A quick refresh or trying again later can help.
Quick Fixes for Google Meet Recording Unavailable
After you know the reason why you can’t record on Google Meet, here are some troubleshooting steps to fix the Google Meet recording issue.
Solution#1. Get a Paid Plan for Google Workspace
As stated above, one of the reasons the Google Meet recording feature missing is due to your Google Workspace account. If you only created a free account, it is expected that the recording feature will be unavailable, as it is exclusively offered as part of paid Google Workspace plans. This means that, if you want to have the recording feature, you need to get a paid plan. Below are some of the paid plans that offer this feature.
- Business Standard
- Business Plus
- Enterprise Essentials
- Enterprise Standard
- Enterprise Plus
- Education Plus (for schools)
- Teaching and Learning Upgrade (for educators)
Solution#2. Check if the Recording Feature is enabled
By default, the recording feature is disabled for all organizational units. It can only be enabled by the administrator of the Google Workspace account. Therefore, if the recording feature on your Google Meet is not available, it is essential to check your settings to see if it is enabled. See the guide below.
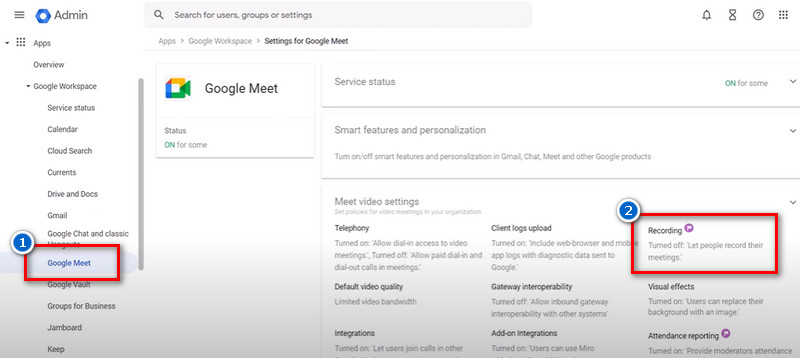
For Google Workspace Admins
- First, go to Google Admin Console and sign in with your admin account. Next, navigate to Apps > Google Workspace > Google Meet to access the service settings.
- From there, click Meet video settings and select the Organizational Unit (OU) that you want to change the settings for.
- Within this section, scroll down and check the box labeled “Let people record their meetings.” Then, click Save.
For Regular Users
Suppose you are a regular user and you are the host or co-host of the meeting. In that case, you can record the session as long as your account is part of an eligible Google Workspace plan. Also, recording must be enabled by your admin if you're part of a school or company account. Here's how you can record the meeting:
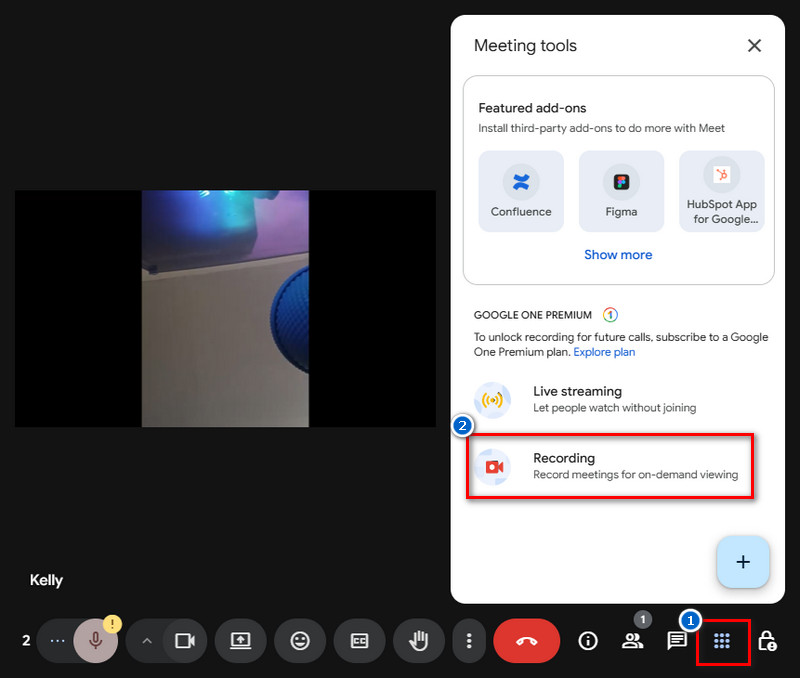
- Join or start a Google Meet on a computer. At the bottom right, click the Activities icon (the square with shapes). Then, select Recording from the list.
- Here, click Start Recording, and a prompt will appear. Click Start again to confirm. Then, everyone in the meeting will be notified that the recording has started.
- Once you stop the recording or the meeting ends, the file will be saved automatically to the host's Google Drive, and a link will be shared via email.
Solution#3. Join the Meeting on Your Computer
While Google Meet is available on various devices, the recording feature is only available on a computer. If you create a meeting or join one using your mobile phone, you won't be able to access the recording feature. To resolve this issue, simply switch to a laptop or desktop and sign in using the same Google account. Then, rejoin the meeting. Google hasn't added that feature to the mobile version yet. So, whenever you need to record an important meeting, always use a computer to join.
Recording needs to be enabled in the admin console.
If it's disabled, you won't be able to record your meetings. Google Meet only supports the recording feature on a computer. Using a mobile phone to do so won't work.
Solution#4. Record the Meeting Before Presenting
If you are a presenter in your meeting, you may notice that the Google Meet recording not showing up. This is because when you start presenting your screen right away, Google Meet sometimes hides certain controls, including the record button. To avoid this issue, ensure that you start the recording before you begin presenting. By doing this, you’ll ensure that the entire session, including your presentation, is captured, and you won’t miss anything important.
Solution#5. Schedule a Meeting as a Person
Meetings that are scheduled or created using conference room resources are not allowed to be recorded. This is because those types of accounts aren't considered actual users, and only human users with proper permissions can start a recording in Google Meet. To avoid this problem, ensure that you schedule the meeting using your own Google account, not a shared resource or a room. That way, you'll be recognized as the meeting organizer, and you'll have full access to features like recording. Below is a guide on how to schedule a meeting as a person.
Schedule Meeting on Google Calendar
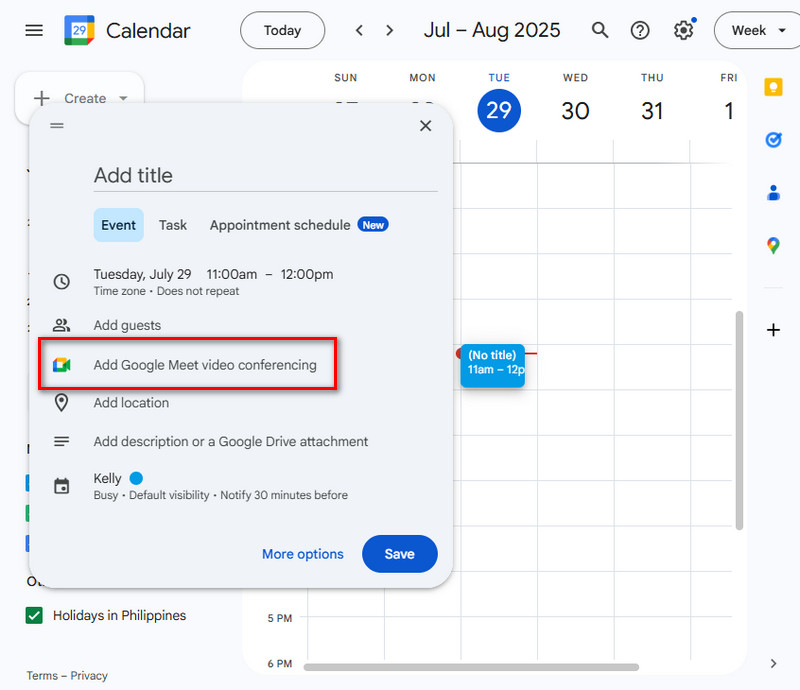
- Go to Google Apps and locate the Google Calendar option. Next, click on the desired date and time to create a new event, or click the Create button in the upper left corner.
- Next, fill in the event details, including the title, guests, and conference details, to ensure all necessary participants are invited and aware of the meeting's purpose.
- Finally, click "Save" to finalize the event, and the Google Meet link will be automatically generated and embedded within the calendar invitation.
Schedule a Meeting on Your Account
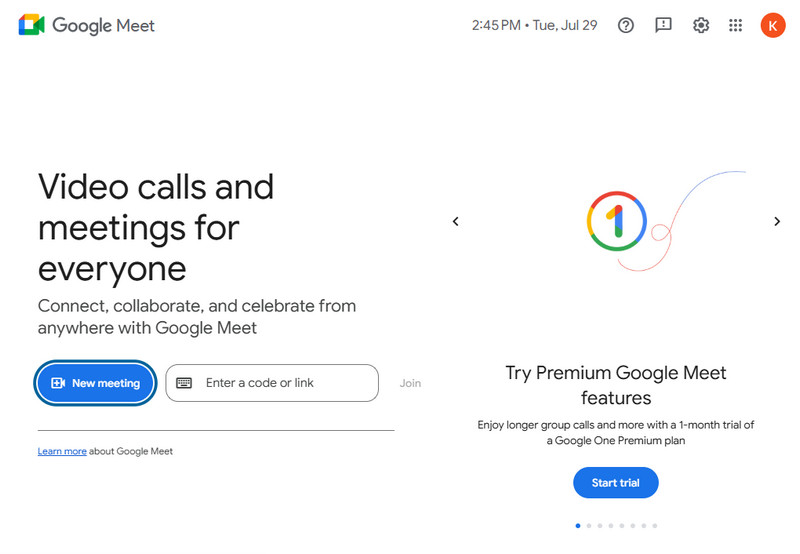
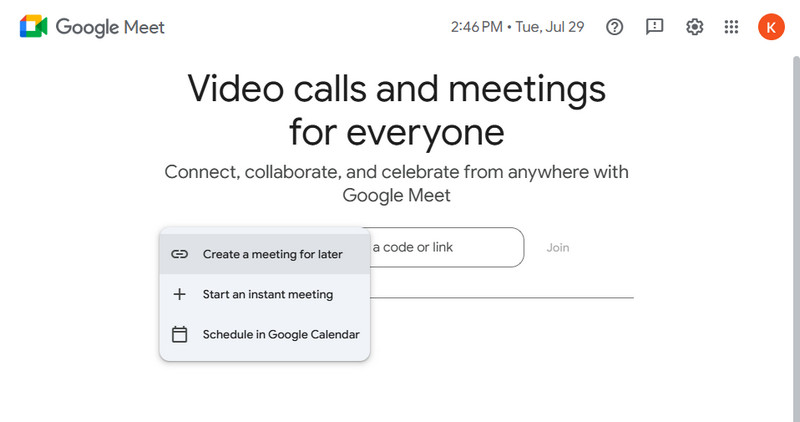
- On your Google Meet account, hit the New Meeting button on the main homepage. From there, you will see three options: Create a meeting for later, Start an instant meeting, and Schedule in Google Calendar.
- Select "Create a meeting for later" to generate a link that you can share with participants at a future time. Next, copy the meeting link and share it with your participants.
- Alternatively, you can select the "Start an instant meeting" option to begin a live session immediately.
Solution#6. Contact Customer Support
If you've tried all the steps and still the Google Meet recording not working, the best thing to do next is to contact Google support. There may be an issue with your account that only Google can resolve, especially if you're using a Google Workspace (paid) account for school or work purposes.
To get help, you can ask your Google Workspace admin to reach out to support through the Admin Console. They usually have faster support options, such as chat, email, or even a phone call. On the other hand, if you're using a free personal Gmail account, you can visit the Google Meet Help Center and post your issue in the community forum, or check if others have had the same problem.
How to Record Google Meet Without Built-in Recording
Recording a meeting on Google Meet using its built-in recording feature can be too much of a hassle, especially if you encounter issues like “Google Meet recording unavailable.” So, to lessen the frustration and hassle, consider using third-party screen recording tools.
1. Aqua Demo
If you want to record your Google Meet session, but the recording feature is unavailable or you’re not the host of the meeting and you don’t have permission, then a third-party screen recording tool like Aqua Demo might help you. It’s a lightweight screen recorder that makes it easy to record everything happening on your screen. This is especially useful if you want to record remote meetings for later reference. The tool supports full-screen and custom-area recording, perfect for recording a video on your PC or a specific window or browser tab, with up to 4K resolution in various video formats, including MP4, AVI, MKV, etc. Additionally, Aqua Demo supports capturing internal audio and the microphone simultaneously with the webcam. Not only that, but this screen recorder tool stands out with its Task Scheduler feature, which is perfect when you have a scheduled meeting on Google Meet. Beyond its recording capabilities, this tool also offers basic editing features, including trim, crop, and various annotations such as shapes, arrows, highlights, and more. In the next section, I’ll guide you through setting up Aqua Demo and starting the recording process in just a few clicks.
Step 1. Get the Third-party Recording Tool
Of course, you can't start recording your Google Meet session if you don't have the app yet. To obtain it, click any of the download buttons above to download the installer file. After downloading, locate the file on your local storage and start the installation process. You need to follow all the prompts that pop up on your screen for successful installation. Then, once done, Aqua Demo will launch automatically on your screen.
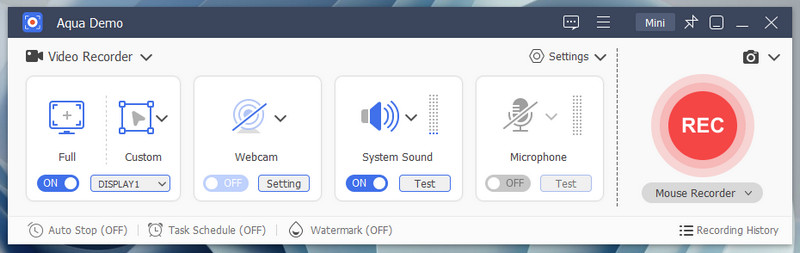
Step 2. Set Up the Recording Options
After exploring the tool, navigate to the recording settings and customize it based on your preferences. Simply, click the "Settings" drop-down menu and select "Record Settings" from the menu. Then, on the pop-up tab, you can change the settings from video to sound settings, output settings, or keyboard shortcuts. Then, hit OK to save the changes.

Step 3. Start to Record Your Google Meet Session
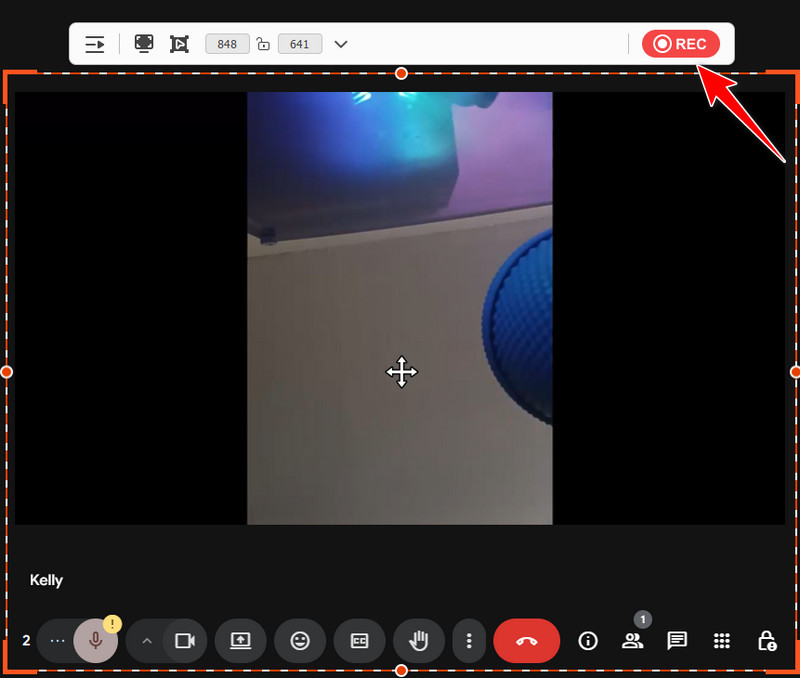
Next, join the Google Meet session you want to capture and then set the recording area. Simply adjust the recording frame to get the entire meeting window or a specific portion of your screen. Then, enable System audio and Microphone audio to capture the meeting audio. Once all is set, hit the REC button to begin recording once the meeting starts.
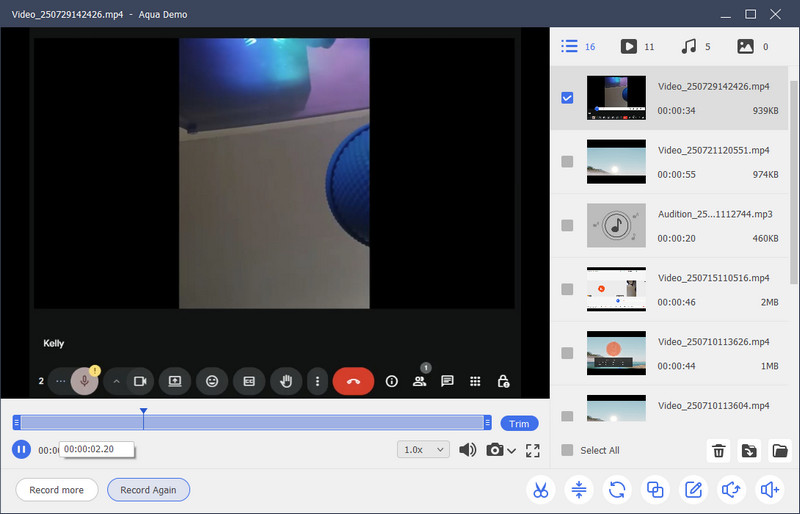
Step 4. Preview and Locate the Recorded Session
When the meeting ends, click the Stop button to end the recording. A preview window will then appear for immediate review. You can also trim any unnecessary clips from the recorded meeting if you prefer. After that, locate the session in the designated output folder that you set earlier in the settings.
2. Aquapp Online Screencast
Another way to capture a Google Meet session if the recording feature is unavailable in the app is to use Aquapp Online Screencast. It is a web-based screen recording tool that is perfect for anyone who doesn’t want to install third-party tools on their computer. Like a regular screen recorder, it can also record your computer screen and webcam simultaneously. Plus, the tool also allows you to record audio from computer as well as your microphone, perfect for making instructional videos or presentations or even to record Zoom meetings with ease. Moreover, this online screencast is safe to use for recording your Google Meet session because it comes with end-to-end encryption, ensuring your recordings are secure. On top of that, this tool works seamlessly on any browser you have, such as Edge, Mozilla Firefox, Chrome, and more. Plus, sharing a tab or application window is easy; just select from the pop-up window what you want to share and record seamlessly. Here’s how to do it.
Step 1. Click Get Started
The first thing you must do is to find the main page of Aquapp Online Screencast. To do that, you can simply click its name above with the embedded link. Then, click the "Get Started" button to go through the screen recording page.
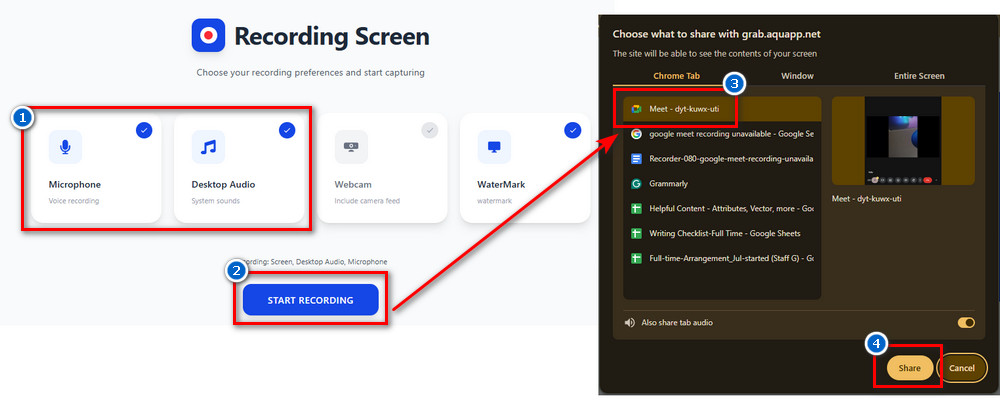
Step 2. Select the Google Meet Window to Share
Next, enable the microphone and system sound, and then click the Start Recording button below. A new pop-up tab will appear on your screen, allowing you to select which window you would like to share. Next, locate the Google Meet window and click on it. Then, click the Share button.
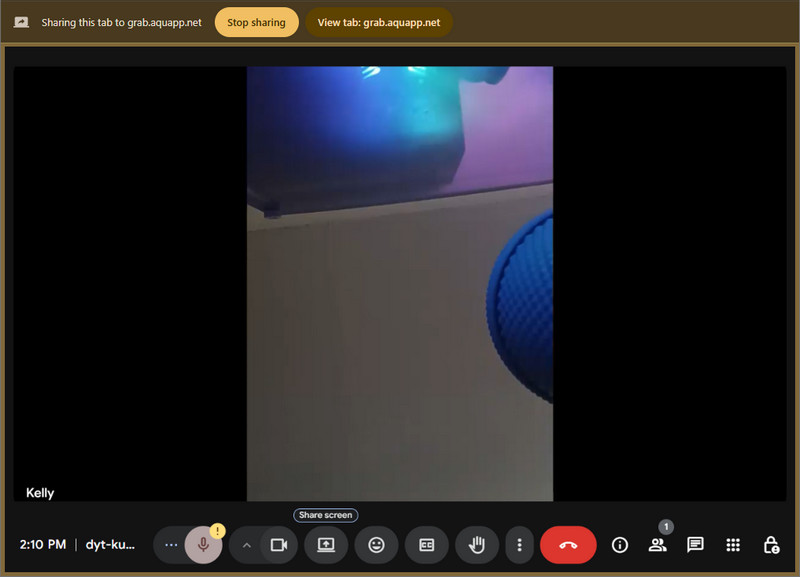
Step 3. Stop the Recording
Once you hit the Share button, the recording will start immediately. You can also see a notification above your Google Meet window that the screen is being shared. Once the meeting ends, click the "Stop Sharing" button on the Google Meet window and return to the web-based tool. There, hit the Stop Recording to end the recording.
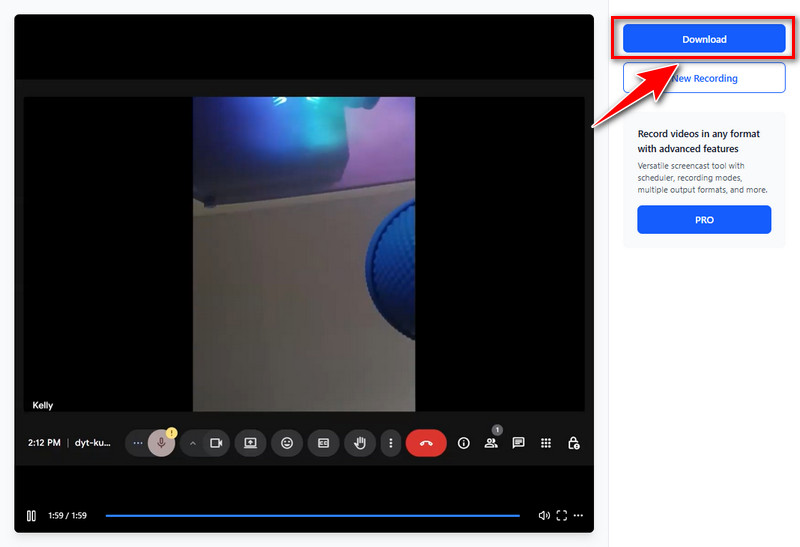
Step 4. Preview and Download the Recorded Session
Then, you will proceed to the preview window, where you can view the recorded meeting. After that, you can download the recorded session to your local storage. Simply click the Download button above, select an output folder, rename the file, and hit Save.
Frequently Asked Questions
Why is it not letting me record a Google Meet?
There are several reasons why you might not be able to record a Google Meet. The most common one is that you're using a free Google account, which doesn't support recording. It's also possible that you're not the meeting organizer or that your admin hasn't enabled the recording feature yet.

How can you tell if a Google Meet is being recorded?
When you start recording a meeting, a red "REC" icon or a small banner at the top of the screen will appear, indicating to everyone that recording has begun. Google Meet also announces when recording starts and stops. So if you see or hear any of these, you'll know the meeting is being recorded.
What happens if you leave the Google Meet without stopping the recording?
If you're the one who started the recording and leaves, the recording will automatically stop once everyone else has left as well. Google will save the video to your Drive, and you'll also get an email with the link. So don't worry—it won't keep recording forever if no one's there.
Conclusion
To wrap it up, Google Meet's recording feature isn't available to everyone by default. It only works with certain Google Workspace plans and proper permissions. If the record button is missing, it may be due to your account type, admin settings, or other minor technical issues. Also, ensure your account is eligible, that your admin has turned on the feature, and that you're joining from a computer (not a mobile device). If recording still isn't an option, you can try using third-party screen recorders, such as Aqua Demo and Aquapp Online Screencast. However, be sure to let others know you're recording. Additionally, getting consent from everyone in the meeting is not only polite but also essential for privacy and legal reasons. Hopefully, this guide has helped you identify the cause of the issue and know how to fix it.