While Windows offers various ways to capture screenshots, these methods only capture content within a specific region of the browser's view area. But what if you need to capture an entire scrolling window of a website? The best solution is to use a third-party screenshot tool designed for this purpose. This versatile tool allows you to record your screen or take screenshots, including scrolling areas. Furthermore, we have provided different tools you can use to make your work more convenient. This article will guide you through the scrolling capture process on various browsers with the help of built-in screenshot tools for Windows, desktop software, or even a browser extension. So, without any further, let's start to discover how scrolling screenshot Windows works!
| Sections | Brief Details |
|---|---|
| Capture Scrolling Screenshots on Windows on a Webpage | Steps in taking long screenshots on different web browsers like Chrome, Firefox, and Edge Find More |
| Capture Long Screenshots for Windows 10 and Earlier | Steps in using the built-in tool of Windows 10 for screenshots Find More |
| Advanced Way to Take Long Screenshots on Windows | Guide in using a top-rated desktop software for taking a scrolling screenshot Find More |
| Capture Scrolling Screenshots with Web Browser Extensions | List of the three best add-ons to easily take a long screenshot on Windows Find More |
| Frequently Asked Questions | Latest and common queries with answers for a clear understanding about scrolling screenshot Find More |
| Conclusion | Key takeaways of all the essential details needed in taking a scrolling screenshots Windows Find More |
Capture Scrolling Screenshots on Windows on a Webpage
1. Capture Scrolling Screenshots for Chrome
Capturing long screenshots on Chrome can be essential for saving entire web pages, especially for tutorials, research, or documentation. Unlike standard screenshots that capture only the visible part of the screen, long screenshots include the entire scrollable area. However, capturing a long screenshot of a Google Chrome page is tricky and involves several steps. This guide will walk you through the best methods, ensuring you get all the important details. The process is given below:
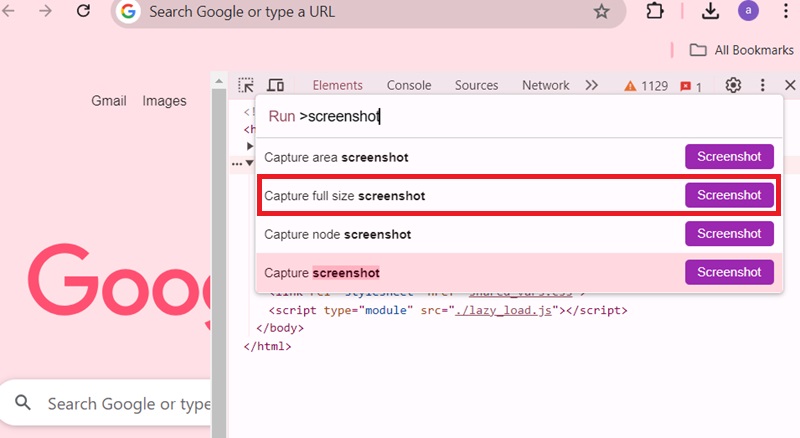
- Open Google Chrome on your PC and visit the webpage you want to capture. Press "Ctrl + Shift + I" on your keyboard to open the Inspect panel.
- After that, press "Ctrl + Shift + P" on your keyboard to open the Command menu. In the Command box, type "Screenshot."
- Then, select "Capture full size screenshot" from the results that appear. Hit the button to take a long screenshot, and it will be automatically saved on your Windows computer.
2. Take Scrolling Screenshots for Edge
Taking a scrolling screenshot on Windows with Microsoft Edge is straightforward. This feature allows you to capture entire web pages effortlessly, making it ideal for saving comprehensive content. The method is intuitive and user-friendly, ensuring you can easily save long screenshots with your preferred name and location. The detailed process of how to capture long screenshot Windows on Edge web page is written below.
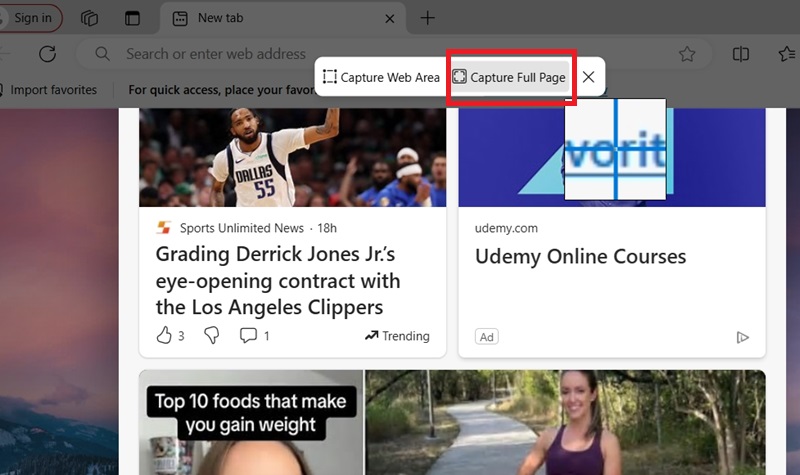
- Open Microsoft Edge on your Windows computer and navigate to the page you want to capture. Then, press the "Ctrl + Shift + S" on your keyboard to open the "Web Capture" panel.
- In the Web Capture panel, select "Capture full page" to capture a screenshot of the whole web page. Once you've done this, hit the "check" icon on the toolbar, and the screenshot will be added to your clipboard.
- You can paste the screenshot into Paint or another image editing tool to save it. If you want to take more long screenshots on Edge, follow the same process.
3. Capture Long Screenshots for Mozilla Firefox
Mozilla Firefox provides a straightforward solution for capturing long screenshots on Windows or Mac. With a few presses on your keyboard, you can ensure a seamless process, enabling you to save long screenshots effortlessly. The detailed steps are outlined below that you can follow for a faster approach:
- To capture scrolling window using Mozilla Firefox on your Windows PC, open the browser and navigate to the webpage you want to capture in its entirety.
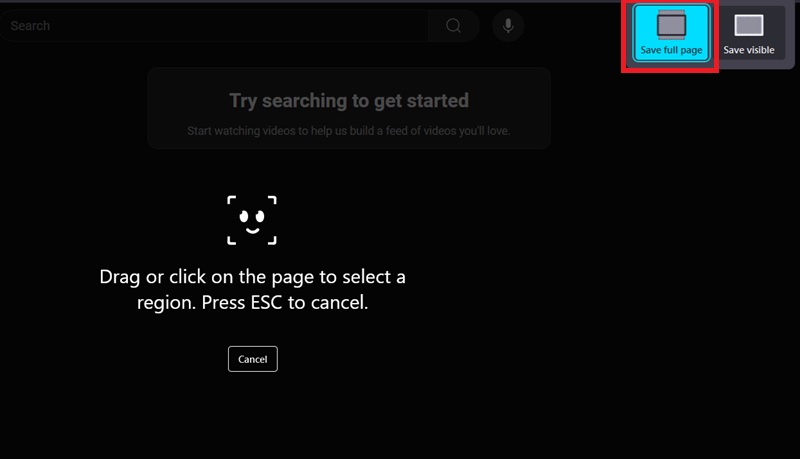
- Access Firefox's Command menu by pressing "Ctrl + Shift + S" on your keyboard. Then, select "Save full page," enabling you to initiate the screenshot capture process.
- Once the Preview screen appears, click " Download " at the top-right corner of the screen. This action will prompt a dialogue box where you can specify the save location and filename for your scrolling screenshot on your PC.
Capture Screenshots for Windows 10 and Earlier
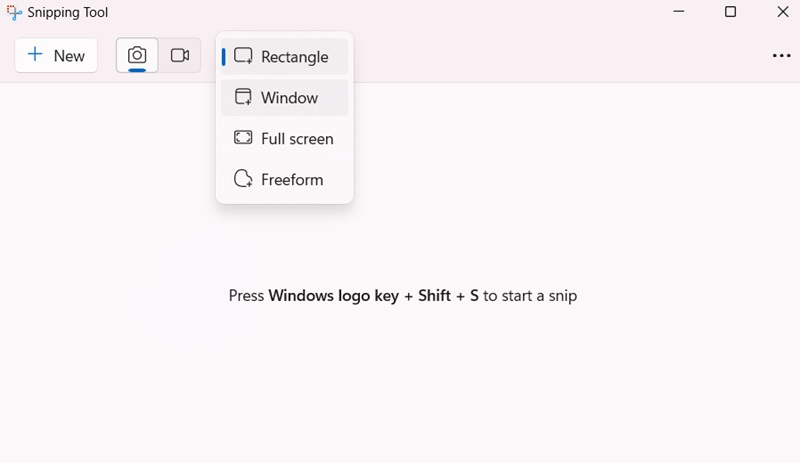
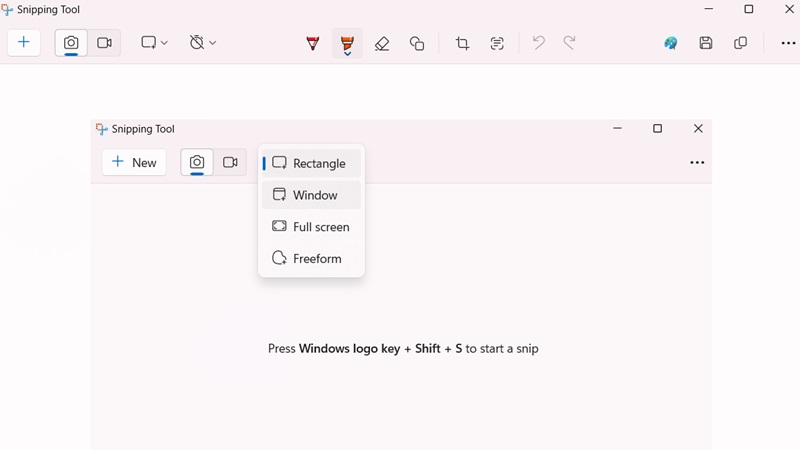
The Snipping Tool has evolved significantly since its debut with Windows Vista, merging functionalities with Snip & Sketch into a unified experience. Initially a basic tool for capturing screen regions, it transitioned with Windows 10's update to integrate Snip & Sketch's modern user interface. This combination streamlined screen capture tasks by offering a variety of capture modes, annotation tools, and easy sharing options. The result is a versatile tool under the traditional Snipping Tool name, providing users with a robust solution for seamlessly capturing, editing, and sharing screenshots across Windows environments. However, remember that the new Snipping Tool can only capture rectangles, windows, full screens, freeform screens, and scroll screenshot Windows is unavailable. If you’re wondering how to find the Snipping Tool in Windows 11, you can see the guide below.
Step 1. Open the Snipping Tool
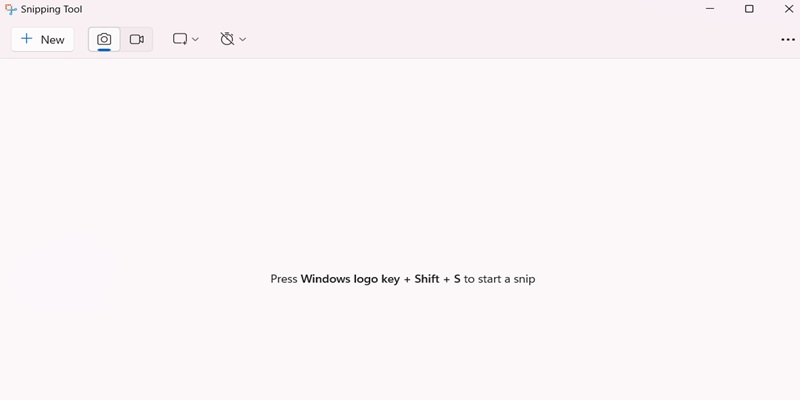
First, open the Snipping Tool app by pressing the "Windows + Shift + S" shortcut keys. Alternatively, you can search for "Snipping Tool" using the search option in your Task Bar. The tool is already built into Windows 10, so installing it is unnecessary.
Step 2. Take a Screenshot on Windows
Once done, go to the area you want to take a screenshot and relaunch the Snipping Tool. Then, select the "Snipping mode" from the top menu and choose your preferred screenshot mode. After that, hold and drag your mouse cursor to the area you need to release it to take a screenshot.
Step 3. Edit and Save the Screenshot
After taking a screenshot, the editing interface will appear, allowing you to add other details to the image. For instance, you can add annotations, highlight essential details, crop unwanted parts, and more. Finally, hit the "Save" icon in the top-right corner to keep the screenshot completely.
Advanced Way to Take Long Screenshots on Windows
Aqua Demo offers an advanced solution for taking long screenshots on Windows computers with precise control over starting and ending points. It has customizable hotkeys to enhance efficiency, allowing users to capture screenshots quickly and conveniently. Also, the tool supports multiple output formats, including PNG, JPEG, BMP, GIF, and TIFF, catering to your preferences. Unlike other tools, Aqua Demo enables instant full-page captures, ensuring no content is missed. That said, you can easily screenshot a Google Map or orther important activity on your screen. Furthermore, its feature-rich capabilities make it superior, providing comprehensive functionality for capturing, saving, and sharing screenshots effectively. It is ideal for casual users and professionals needing precise and efficient screenshot capabilities. To know how scrolling screenshot in Windows works with Aqua Demo, follow the guide below.
Step 1. Install the Best Scrolling Screenshot App
Install the screenshot tool by hitting the left “Download” button above for the Windows OS. After hitting the button, the installation program will appear. Run it and follow the guide on the prompts to complete the installation process. Then, open the Aqua Demo program and explore it.
Step 2. Start Taking a Screenshot
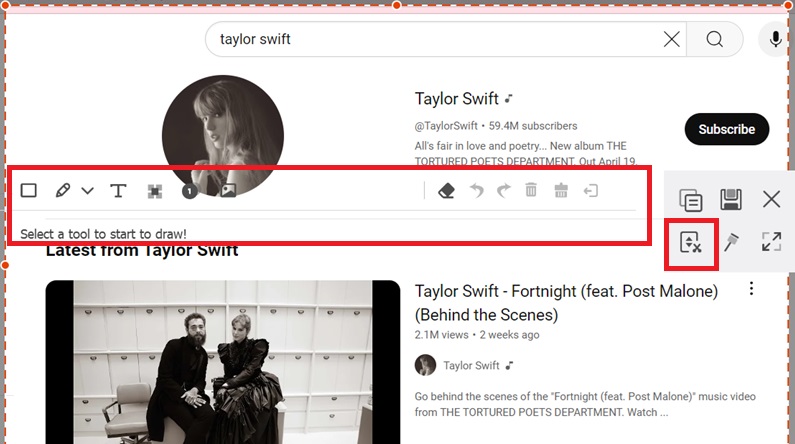
Next, head to the web page or window you want to do a long screenshot. After that, hit the “drop-down” icon beside the “Video Recorder” and select “Screen Capture” from the options. Later, select the area where you want to start the capture and hit “Scrolling Window.” Now, scroll down to capture the content. During the process, you can use the tool’s annotation to highlight important details.
Step 3. Save the Long Screenshot
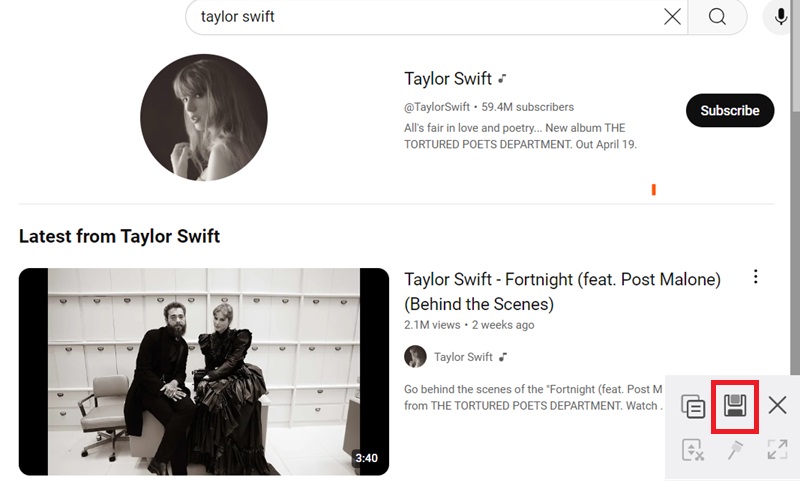
Once finished, the preview window will appear where you can check the captured web page. You can scroll down to check the entire image according to your liking. Finally, hit the “Save” button on the floating menu to save the image on your computer.
Step 4. Check the Output File
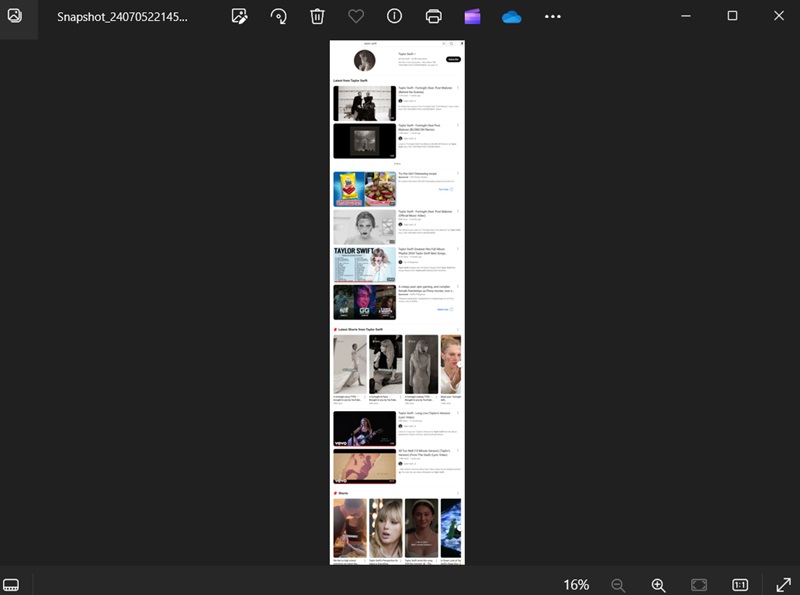
If you want to have a check on the entire screenshot, you can go to the folder where you saved the file. Then, right-click the image to open and check it. You can view the whole image even if it is long. Also, you can zoom in on the image to see small details if needed.
Capture Scrolling Screenshots with Web Browser Extensions
1. Nimbus Screenshot & Screen Video Recorder
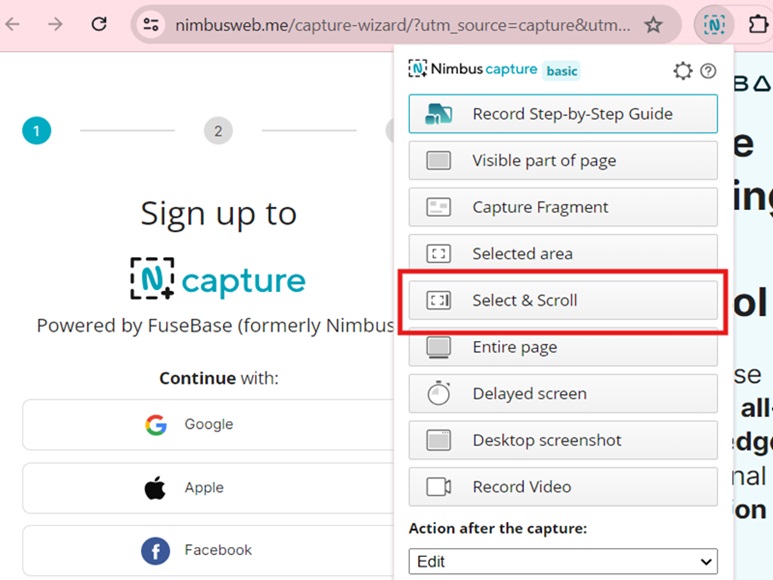
Nimbus, or Nimbus Screenshot & Screen Video Recorder, is a widely adopted Google Chrome extension utilized by millions globally to scroll screenshot Windows. It's renowned for capturing entire, partial, and scrolling screenshots, with options to save in JPG or PNG formats directly to Dropbox or Google Drive. Additionally, Nimbus excels in screen video recording, making it a versatile tool for various user needs. Its combined capture and editing capabilities also support saving to PDF, enhancing its utility for tasks requiring comprehensive screen capture and editing functionalities.
2. Movavi ScreenShot
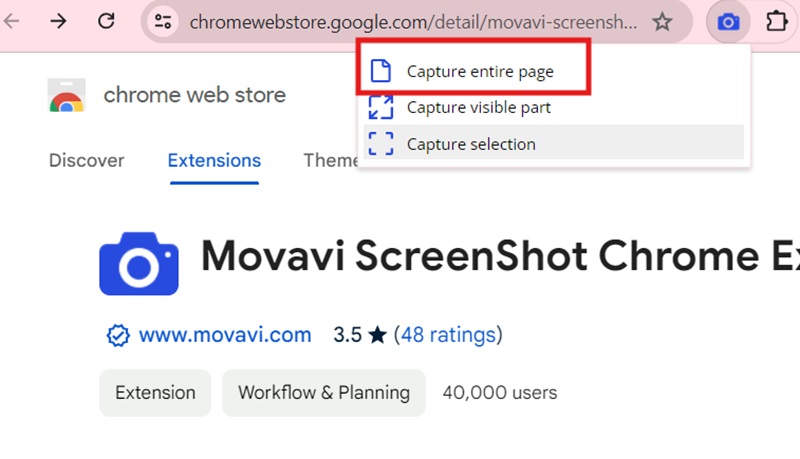
Movavi Screenshot is a free screenshot tool offered as an extension for Google Chrome and Mozilla Firefox, catering to widespread user accessibility. It enables capturing full-page and scrolling screenshots of web pages and documents directly from your browser. Besides, the tool includes intuitive editing features for modifying screenshots. It supports saving in formats such as PDF, JPEG, and GIF. You can also seamlessly upload screenshots to OneNote or share them via email using the extension, making it a versatile choice for casual users and professionals needing efficient screenshot capabilities.
3. GoFullPage
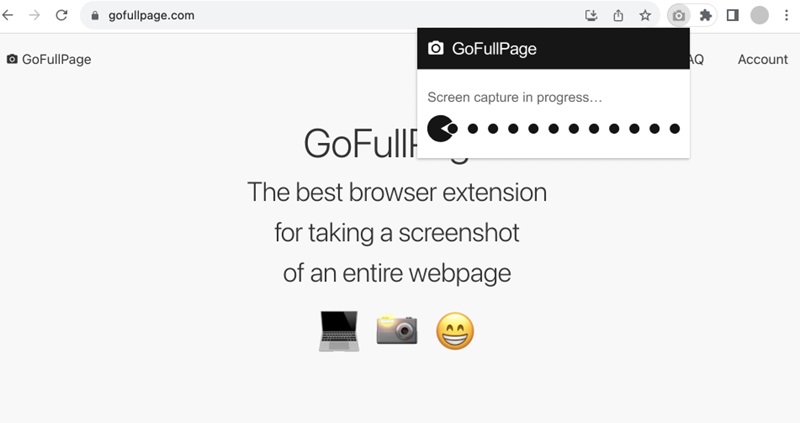
GoFullPage is a versatile extension for capturing scrolling screenshots on Windows 10 and other Windows versions and Macs. Available on Google Chrome, it offers a free version with an optional $1 monthly premium upgrade for additional features. The tool is straightforward, delivering high-quality images and providing effortless options for saving and sharing screenshots in JPG, PNG, and PDF formats. With the premium editor, you can crop, annotate, and even add emojis to enhance your screenshots, making it a comprehensive solution for professional screenshot needs.
Frequently Asked Questions
What formats can I save scrolling screenshots in on Windows?
Most scrolling screenshot tools on Windows support saving screenshots in common formats such as PNG, JPEG, PDF, and sometimes GIF or TIFF. The choice of format often depends on the specific tool or extension being used.

Can I annotate or edit scrolling screenshots on Windows?
Many scrolling screenshot tools, like Aqua Demo for Windows, include built-in annotation and editing features. These tools allow users to crop, annotate with text, arrows, or shapes, and even add highlights or blur effects to screenshots before saving or sharing them.

Are there any limitations to capturing scrolling screenshots on Windows?
While many tools can capture scrolling content from web pages and documents, some limitations may apply depending on the webpage's or application's complexity. For instance, certain dynamic or heavily interactive elements may not capture accurately, requiring adjustments or multiple captures.

Conclusion
In conclusion, we've explored various methods for capturing scrolling screenshots on Windows, ranging from browser-specific extensions to advanced tools like Aqua Demo. Windows' built-in tools, such as Snipping Tool, offer basic functionality. In contrast, third-party tools provide more robust features like annotation and format options. When choosing a method, consider your specific needs, whether capturing web content, annotating screenshots, or automating captures. Each technique offers unique advantages, from simplicity and integration to enhanced editing capabilities. Selecting the right tool ensures you can efficiently screen capture scrolling window and utilize screenshots tailored to your requirements. For instance, comparing Greenshot vs Snagit for screenshots can help you decide which one best matches your workflow.


