On This Page
Minecraft is one of the most popular games in the world, and millions of players love it. It lets you explore, build, and create anything you can imagine. With its simple graphics and endless possibilities, players of all ages enjoy the game. Whether you play alone or with friends, every adventure is unique. That's why many people want to record their gameplay. Recording Minecraft on PC is useful for many reasons. You can create YouTube videos, make tutorials, or save your best moments. Some players record to share their skills, while others just want to keep memories of their builds. No matter the reason, a good recording setup helps you capture smooth, high-quality videos. This article will explore the best way to record Minecraft on PC. Additionally, we'll cover different tools and give helpful tips to improve your recording quality. Let's dig in!
| Screen Recorders | Ease of Use | Price |
|---|---|---|
| Aqua Demo | Very easy | Free and paid: $19.95 - $42.95 |
| Windows Game Bar | Easy | Free - Built-in on Windows 10 and 11 |
| OBS Studio | Difficult | Free and open-source |
| Bandicam | Easy | Free and paid: $33.26 - $64.90 |
| NVIDIA ShadowPlay | Easy | Free for NVIDIA Graphics Card Users |
| FRAPS | Simple, but outdated | Free and paid: $37 (one-time purchase) |
Best Way to Record Minecraft on PC
Recording a Minecraft game is easy with the right screen recording tool. That being said, Aqua Demo is our recommended tool for you to use to capture your gameplay on a Mac or Windows PC. Aqua Demo is a reliable tool with a simple interface. It is easy to use, which is perfect for all users. Also, one of the best features of this tool is its high-quality output of up to 4K resolution with 60fps. Therefore, you can upload it on your social media accounts without having a problem with quality. Furthermore, this screen recording tool lets you record your microphone audio, system sound, webcam, and PC screen simultaneously without any issues. Moreover, this tool is the best for recording Minecraft on PC because of its task scheduling feature, where you can set a specific time and duration to start and stop the recording automatically. This means you don't need to worry if you forget to stop the recording after playing. To learn how to screen record Minecraft on PC in the easiest way, follow the guide below.
How to Record Minecraft Gameplay on PC
Step 1. Get the Aqua Demo Tool
First, go to the main website of the Aqua Demo and press the Free Download button there. On the other hand, you can choose among the two download buttons above to get the installer file. After downloading, perform the installation process by acquiring the wizard prompts on your PC screen. Then, the screen recording tool will launch automatically once the installation is completed.
Step 2. Modify the Recorder Settings
Before recording your Minecraft gameplay, check the recording settings and see if it meets your requirements. Simply click the Settings drop-down menu and select Record Settings. From here, you can modify it from the General to Hotkeys Settings to meet your preferences. Then, don't forget to hit the OK button to save the changes you've made.

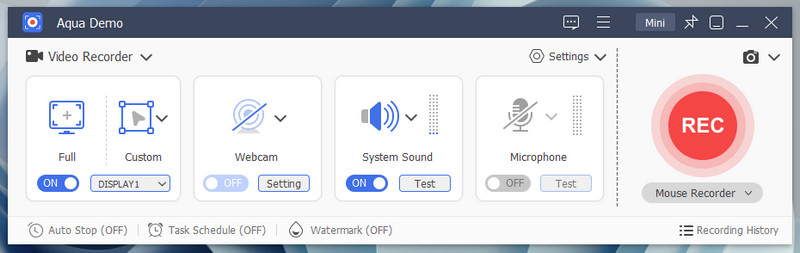
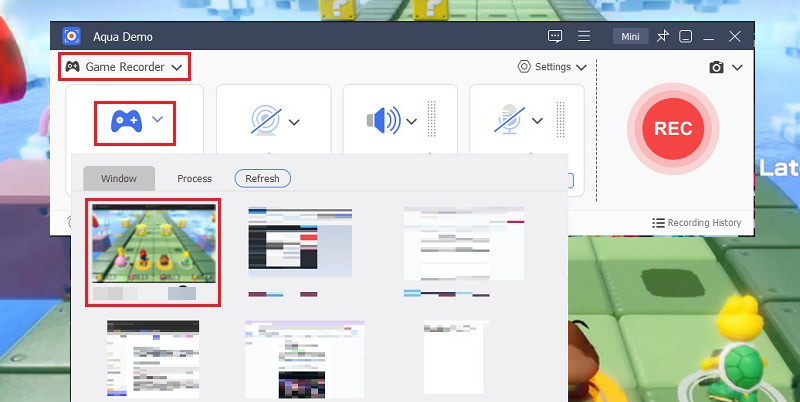
Step 3. Set the Recorder
After modifying the record settings, you must set the recorder. Click on the Video Recorder drop-down menu and choose the Game Recorder option. Then, click on the game controller and select your Minecraft game window. Next, enable your webcam, system sound, and microphone sound to include your voice and yourself in the recording.
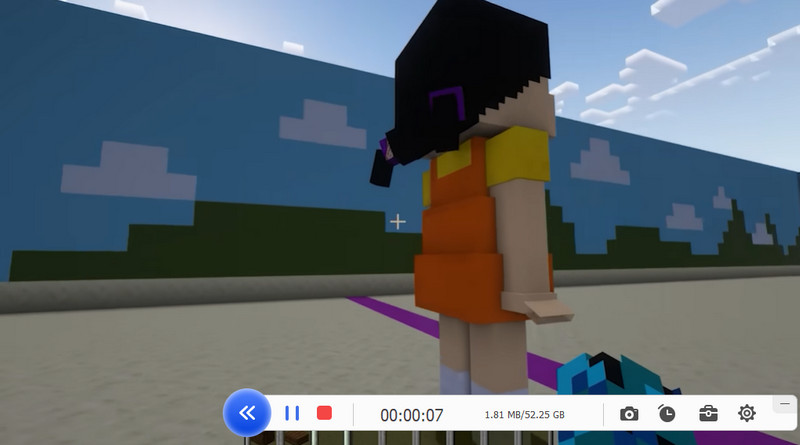
Step 4. Start Recording Minecraft Gameplay
Finally, click the REC button to initiate the recording process and play after the 3-second recording countdown. Once your gameplay is done, simply exit the game window to end the recording or click the stop icon on the taskbar.
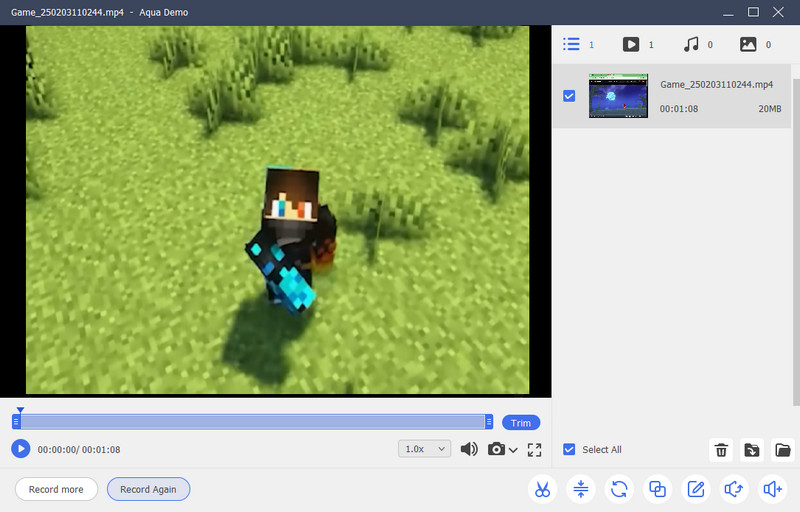
Step 5. Preview the Recording
Once you end the recording, the preview window will appear. From here, you can rewatch and edit your Minecraft gameplay. Lastly, you can share it with your friends or social media accounts, as the recorded video is automatically saved in your preferred format, quality, and output folder you set earlier.
Alternative Tools to Record Minecraft on PC
How do you record Minecraft on PC? Recording Minecraft gameplay is a great way to share your adventures, create tutorials, or save your best moments. Whether you're a beginner or an experienced player, capturing high-quality videos can enhance your gaming experience. With the right tools, you can record smooth gameplay with minimal effort. There are several software options available, each with its strengths and weaknesses. In this section, we'll explore five of the best recording tools for Minecraft and help you choose the one that suits your needs.
1. Windows Game Bar
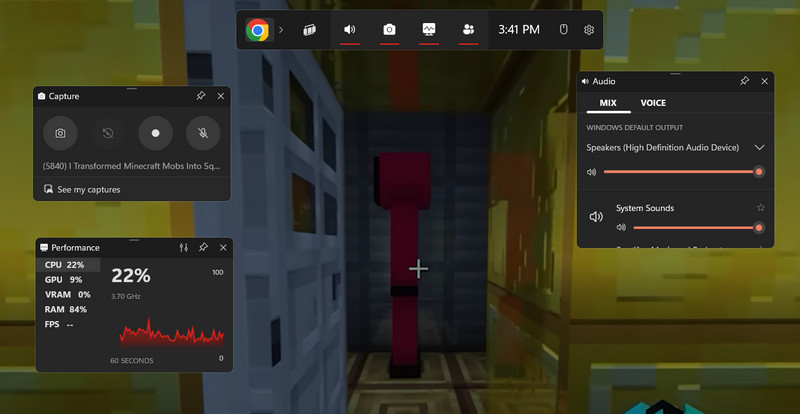
Windows Game Bar (also called Xbox Game Bar) is a built-in gaming overlay in Windows that provides various gaming and screen recording tools. This tool is perfect for Minecraft players who don’t want to install additional software on their PC for reasons like lack of storage. In addition, you can record your gameplay with up to 1080P quality at 60fps. Besides, you can track your PC performance as it displays the CPU, GPU, FPS, and RAM usage while gaming. What sets this tool apart is that it can automatically capture the last minute of your gameplay, making it easy to capture your unplanned highlights. Moreover, Windows Game Bar lets you record and adjust the audio levels of different apps, including game sound, music, and chat apps, directly from the Game Bar. You can also quickly mute or adjust your microphone levels and system audio without leaving the game.
- Works well for basic recording
- It is easy to access with shortcut keys (Windows keys + G).
- It can’t record desktop or File Explorer, only apps/games.
2. OBS Studio
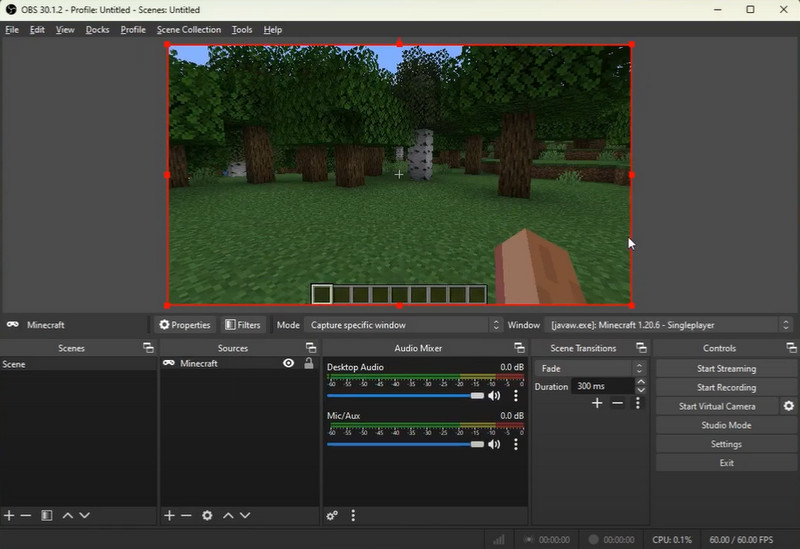
Next in line is OBS Studio, an advanced screen recording tool popular among gamers, content creators, and professionals. Unlike the built-in tool, OBS allows high-quality recordings from 1080p to 4K with frame rates up to 240 FPS. This tool stands out because you can stream your Minecraft gameplay directly on YouTube, Facebook, X, and other streaming platforms. Moreover, record your game with OBS in different layouts from different sources and switch from there smoothly. This includes webcams, gameplay, text, overlays, and many more. Besides, you can adjust the bitrate dynamically to prevent lag during network fluctuations. Another best feature of OBS is that it can capture and separate system audio, microphone input, and other sources, providing advanced mixing controls. What’s more, this screen recording tool lets you save your recordings in various media formats such as MP4, MKV, FLV, etc.
- Completely free to use with no watermarks or restrictions.
- It uses hardware encoding (NVENC, AMD, Intel QSV) for smooth performance.
- It is not beginner-friendly and requires time to set up scenes, sources, and settings.
3. Bandicam
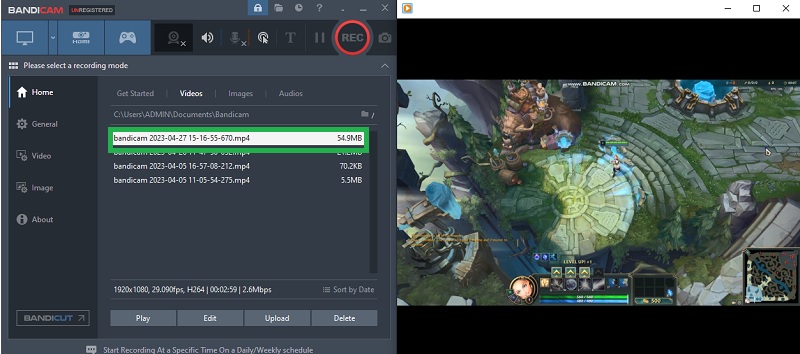
Record Minecraft on PC using Bandicam, a popular screen recording tool known for its high-quality video capture, especially for gaming and desktop recording. This tool captures your Minecraft gameplay in high-definition (4K) with up to 480 FPS for smooth recordings. In fact, Bandicam is often compared to OBS Studio but is more user-friendly and specialized for certain types of recordings. Besides, it can record DirectX/OpenGL games without performance loss, making it a solid choice if you also want to record games on Steam. What’s more, Bandicam allows you to record the entire screen or selected portion with a webcam overlay that is perfect for narration while playing. In fact, this tool sets it apart because it can capture multiple monitors using its multi-display setup with separate audio tracks. Not only that, because this screen recording tool has automated recording and time-lapse recording, which is perfect for Minecraft, making a recording is as easy as a click.
- It can produce smaller file sizes than other software.
- The tool displays your FPS while recording to ensure smooth playback.
- The free version has a watermark
4. NVIDIA ShadowPlay
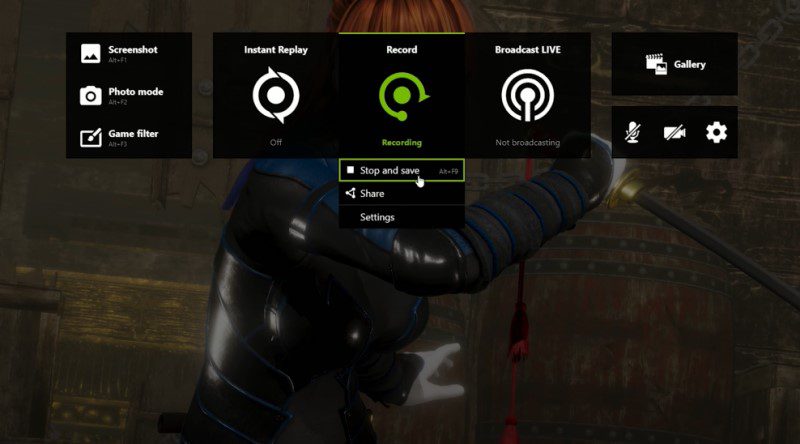
NVIDIA ShadowPlay is a feature of the GeForce Experience software that leverages the power of NVIDIA GPUs to deliver high-quality, low-impact game recording and streaming. The tool supports recording in up to 4K resolution at 60 FPS for smooth and detailed video capture. Likewise, it comes with customizable hotkeys that you can use to record your Minecraft gameplay easily. Like other screen recording tools, ShadowPlay lets you stream directly on Twitch and YouTube with a single click. Additionally, this tool stands out because of its Instant Replay feature. With that, it can automatically record the last 5 to 20 minutes of gameplay in the background without requiring you to hit "record" beforehand. On top of that, the tool can also capture non-game applications, although its primary focus is gaming. So, click the link to learn how to record a Minecraft video on PC.
- You can easily add a webcam feed to your gameplay or stream, which is perfect for showing your reactions.
- No need for additional installation since it's already integrated directly into GeForce Experience.
- This tool only works with NVIDIA graphics cards.
5. FRAPS
FRAPS is a classic screen recording application for old-school Minecraft players that has been around for over a decade. It shows your current FPS (frames per second) in real-time while gaming, so you can monitor the performance of your system during gameplay. Besides, you can place the FPS counter anywhere on the screen and adjust its size or transparency. In addition, FRAPS can record your screen or a specific region of it. However, it's mainly focused on recording games in full-screen mode. Besides, it can record your Minecraft gameplay in up to 4K resolution and supports high frame rates (up to 120 FPS) depending on system capabilities. Moreover, FRAPS is set apart because it includes an integrated tool to measure your game's performance over time. You can set up a specific area or scenario in a game to benchmark and track performance over a period of time.
- FRAPS saves your recordings in AVI format, which is widely supported and can easily be edited in most video editing software.
- Unlike some free software, FRAPS does not impose a time limit on recordings.
- Large file sizes for recorded videos
Frequently Asked Questions
What's the best free software for recording Minecraft?
Aqua Demo is one of the best free tools for recording Minecraft because it is easy to use and provides high-quality recordings. It supports up to 4K quality at 60 FPS while capturing your voice and system sound. The tool also has a task scheduler, so you can start and stop recordings automatically without any effort.

How much storage space do I need for Minecraft recordings?
The storage space depends on the video quality and length of the recording. A 1-hour 1080p video at 60 FPS can take up 4–5GB, while 4K recordings take up about 24-28GB. To save space, you can use a video compressor or choose a more efficient recording format like MP4 instead of AVI.
Can I record Minecraft on a low-end PC?
Yes! Aqua Demo is a great option for low-end PCs because it uses minimal system resources and supports hardware acceleration. To get smooth recordings, lower the game's graphics settings and adjust the recording resolution to 720p or 1080p instead of 4K.
How do I reduce file size without losing quality?
To reduce file size, use a video compressor like HandBrake or adjust the bitrate while recording. Choosing MP4 (H.264 or H.265) format instead of AVI helps keep quality high while reducing file size. You can also record at a slightly lower resolution or frame rate to save space without a big drop in quality.
Conclusion
Recording Minecraft on PC is a great way to save your best moments, create tutorials, or share your adventures with others. This article explored different recording tools like Aqua Demo, Windows Game Bar, OBS Studio, Bandicam, NVIDIA ShadowPlay, and FRAPS, which are considered some of the best Minecraft recorders. Each tool has strengths, so finding the one that works best for you is important. To get the best results, try adjusting your video quality, frame rate, and audio settings. On the other hand, if you have a low-end PC, lower the resolution or use a lightweight recorder like Aqua Demo. Experiment with different settings until you find the perfect balance between quality and performance. Ultimately, share your experiences in the comments and help others improve Minecraft recordings!
Minecraft is a 2011 sandbox game developed and published by Swedish video game developer Mojang Studios.
Originally created by Markus 'Notch' Persson using the Java programming language, the first public alpha build was release on 17 May 2009