On This Page
Discord is one of the most popular platforms for gamers, creators, and professionals to communicate through voice chats and group calls. Many people use it daily for gaming sessions, team meetings, interviews, and podcasts. Sometimes, capturing audio from Discord can make your experience even better. For example, to save an interview, capture a podcast discussion, or keep a record of a meeting for future reference. Moreover, recording can help you replay important conversations and create content more efficiently. Still, it’s important to remember that recording Discord audio should always be done with everyone’s consent to respect privacy and follow rules. To make this process easier, there are reliable tools and methods you can use. In this article, we’ll guide you through simple ways to record Discord audio safely and clearly, so you can capture every important moment without any hassle.
| Methods/Tools | Best For | Difficulty to Use |
|---|---|---|
| Craig Bot | Quick Discord-only recording with minimal setup | Easy |
| Aqua Demo | Screen + audio capture | Easy |
| OBS Studio | Advanced users wanting full control (audio + video) | Expert |
| Audacity | Audio-only recording & editing (podcasts, voice work) | Moderate |
| AceThinker Online Free Audio Recorder | Fast, simple audio capture; no heavy editing needed | Easy |
How to Record Audio from a Discord Call Using Craig Bot
Craig Bot is a popular Discord recording bot that lets users easily record voice chats. It can join your Discord server and start recording audio from multiple people at once, saving each user’s voice separately. This makes it perfect for podcasts, interviews, or online meetings, as you can edit each track later for improved sound quality. Additionally, you can start, stop, and manage recordings using simple chat commands, making it easy to do so. Moreover, Craig Bot automatically saves recordings to the cloud and provides download links after the session, and saves your recordings in high-quality audio formats such as FLAC, MPEG-4 AAC, and more. Because it’s free, reliable, and simple to use, many Discord users prefer Craig Bot as their go-to tool for recording group conversations. However, the recordings can last up to 6 hours and are kept for 7 days before being deleted.
Steps to Add Craig Bot to Your Discord Server
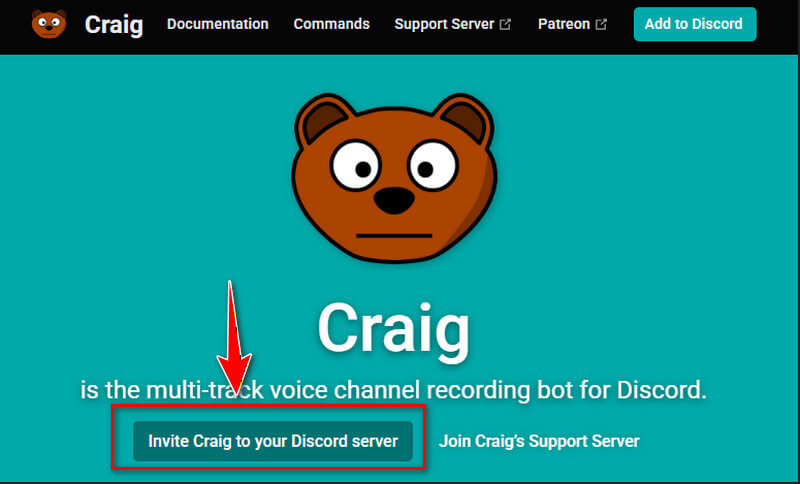
Step 1. Invite Craig to Your Server
First, open Craig Bot's main website in your browser. Then, click the "Invite Craig to your Discord Server" button on its main homepage.
Step 2. Choose a Discord Server
Next, choose a server where you want to record Discord audio. After that, tap the "Continue" button to proceed. Lastly, click "Authorise" and complete the captcha to finish the process.

Start Recording Discord Audio With Craig Bot
Step 3. Set Up Craig Bot
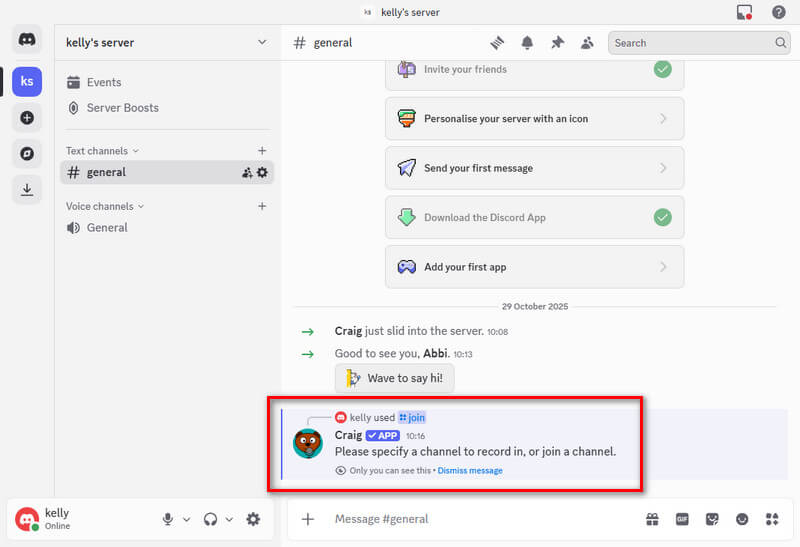
After authorising the bot to join your Discord, go to the Discord channel and set up the bot first. Simply type "/join" and send. Then choose a specific channel you want to record audio from.
Step 4. Stop Audio Recording
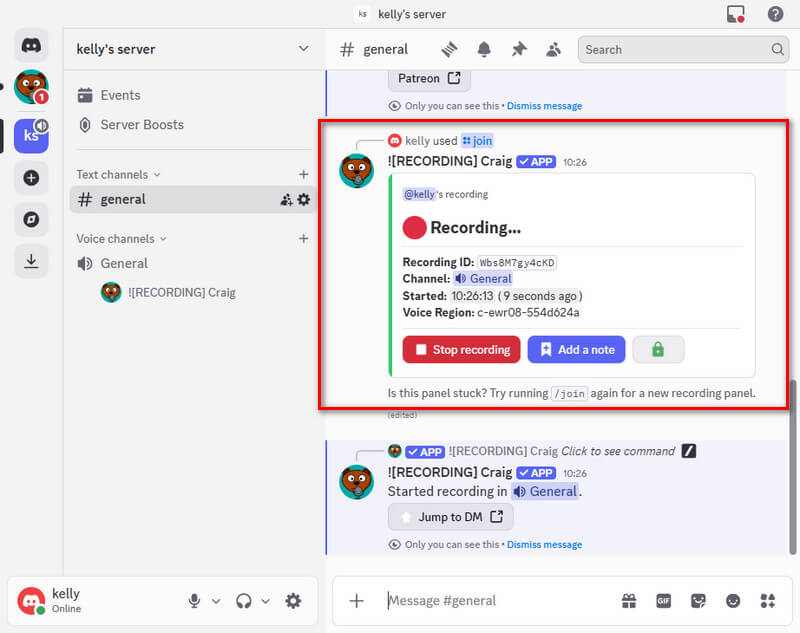
Afterward, the bot will start recording audio in the chosen channel. If you already want to stop the recording, simply type "/stop" and send it into the chatbox. Alternatively, you can click the "Stop Recording" from the recording message.
Step 5. Check and Download the Recorded Audio
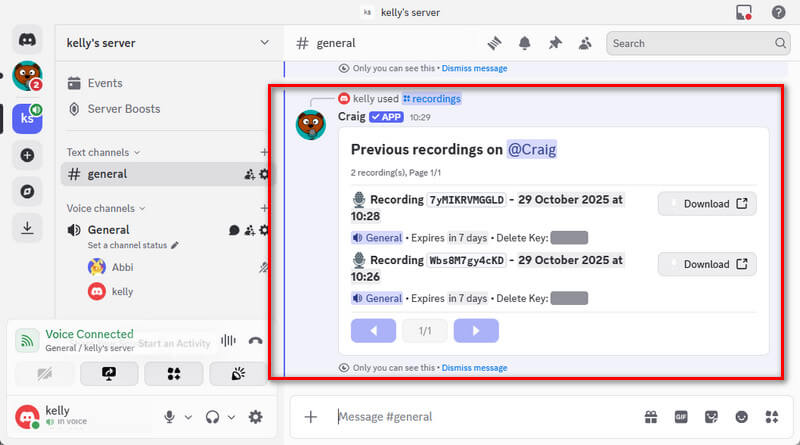
Next, if the "autorecord view" is not enabled, type "/recording" to see all your recordings. Then, you can download them by clicking the "Download" button and confirming that you trust the "Craig horse" site. Lastly, you will open a new tab to download the recorded audio.
Craig will record up to 6 hours, keeps your audio for you to download for 7 days, and has no limit on the number of speakers or voice channel bitrate.
How to Record Discord Audio Easily With Aqua Demo
If you think recording audio using the Craig bot is quite complicated. For that reason, we recommend using a third-party audio recorder, such as Aqua Demo. Though Aqua Demo is known as a reliable screen recording tool, you can also use it for different purposes. One of these is the audio recorder, which allows you to record Discord audio easily. It easily records audio from the computer and the microphone separately or simultaneously. Additionally, you can modify the Aqua Demo audio recording before you start recording. That said, you can choose the audio format, codec, quality, sample rate, and channel settings based on your preferences to achieve high-quality recordings up to 320 kbps in MP3, AAC, FLAC, and other formats. Likewise, the tool allows you to enable Microphone Noise Cancellation and Microphone enhancement to ensure a clear recording when capturing microphone audio. See the guide below.
Step 1. Get the Audio Recorder for Discord
Start by downloading the Aqua Demo installation file. You can get it by clicking the download button above. After getting the file, proceed with the installation and follow all the wizard prompts as they appear on your screen. Once done, the audio reorder will launch automatically.
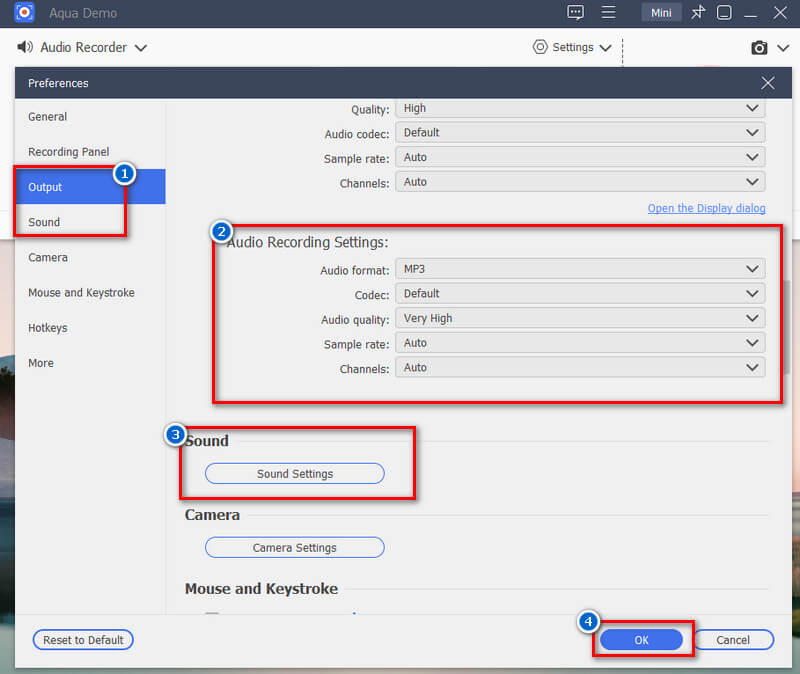
Step 2. Set Up the Recorder
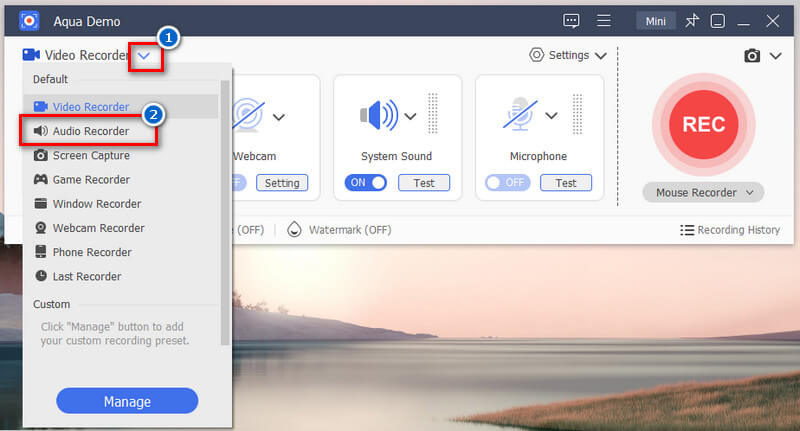
In the "Video Recorder" dropdown, click it and select "Audio Recorder." Then, go to the "Record Settings" and navigate to the "Output Settings" section. Here, start choosing your preferred audio output settings. Start from the audio format up to the channel option. Next, go to the "Sound" settings and customize it to your preferences. Lastly, click "OK" to save.
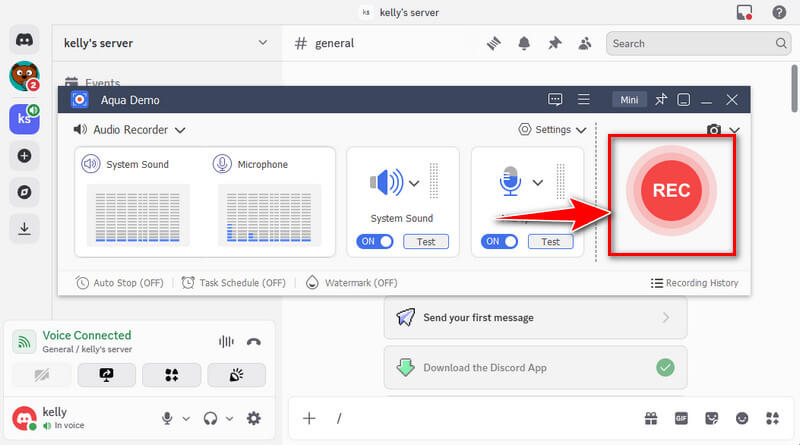
Step 3. Start Recording Discord Audio
Once you finish setting up the recording tool, open the Discord app or website and start an audio call in the channel you want to record. Once the audio call starts, click the "Record" button from Aqua Demo, and the recording will start after 3 seconds.
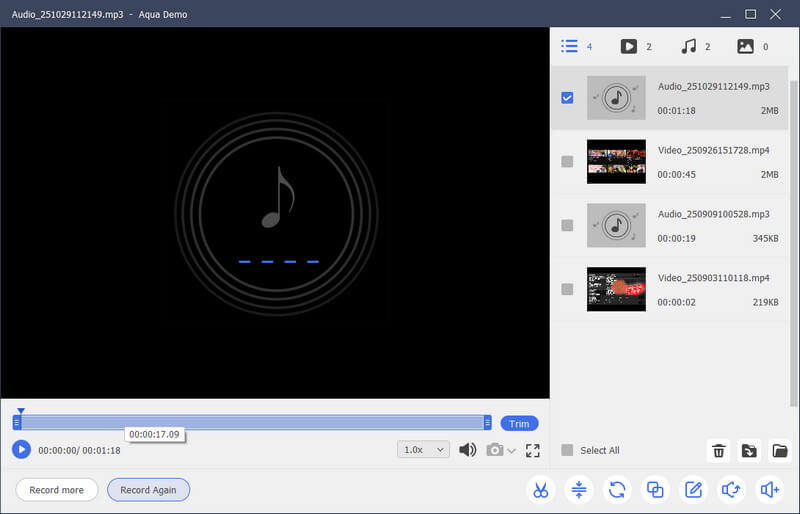
Step 4. Stop and Check the Recorded Audio
When you prefer to stop the recording, simply click the "Stop" icon on the taskbar, and the tool will open the recorded audio in another tab. Also, the recorded audio is automatically saved in your designated folder once you stop the recording. Finally, you can check whether the recorded audio is clear.
How to Record Audio from Discord Using OBS
OBS Studio is known as one of the best screen recorders for gaming . Still, you can also use this tool to record audio from Discord. It lets you capture audio from your microphone, desktop, or both. Also, the tool supports recording multiple audio sources, so you can capture game sounds, music, and voice simultaneously. Additionally, you can record separate audio tracks, making it easier to edit or balance the sound later. For example, you can keep your voice and background music on individual tracks. Furthermore, OBS includes filters such as noise suppression, gain, and a compressor to improve sound quality. These help remove background noise and make your voice clearer during recording. Moreover, it allows you to adjust volume levels, bitrates, and audio formats based on your needs. This helps you get professional-quality recordings for podcasts or videos. Please refer to the guide below.
Step 1. Set Up OBS Studio
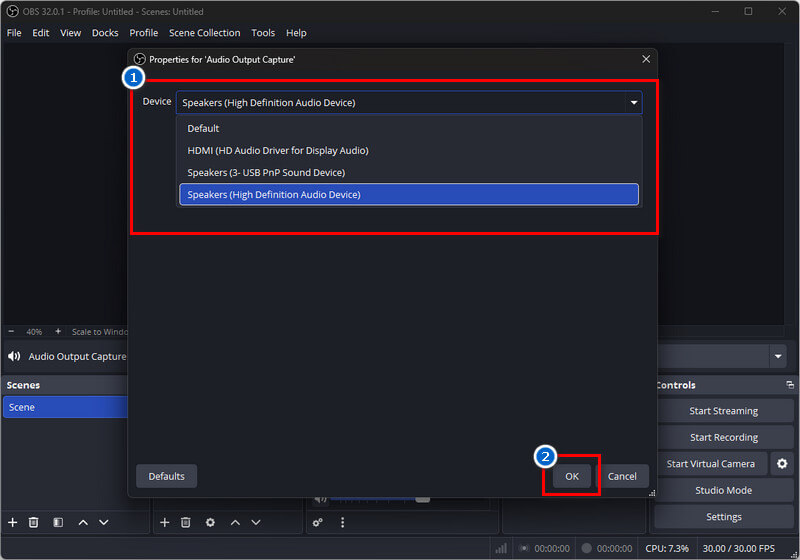
Launch OBS Studio on your computer if you already have it. If not, kindly download it from its official website and install it afterward. Then, on its main interface, navigate to the "Sources" tab and click the "+" icon. From the pop-up menu, select "Audio Input Capture," then select "Audio Output Capture" to view and select your preferred audio devices.

A small new window will appear asking you to name the source, or you can keep the default name or type a new one, then click "OK." Next, choose your microphone or external input device for "Audio Input Capture" and your speakers or headphones for "Audio Output Capture" from the dropdown lists. Finally, click "OK" again to confirm.
Step 2. Configure Audio Output Settings
Next, go to the "Settings" and click the "Audio" tab from the left sidebar. Under the "Global Audio Devices" section, locate "Desktop Audio" and select your preferred output device, such as speakers or headphones, from the dropdown menu. Then, go to the "Output" tab to choose your preferred audio quality and format.

Step 3. Start to Record Discord Audio
Now that your audio input and output are set up, join a Discord voice channel where you want to record the conversation. Then return to OBS Studio and click the "Start Recording" button in the bottom-right corner of the interface. OBS will begin capturing both your microphone and the audio from Discord playing on your desktop. You can monitor sound levels in the Audio Mixer panel to ensure everything is being recorded properly. When the conversation ends, click "Stop Recording" to save the audio file automatically to your chosen output folder.

How to Record Discord Calls With Audacity
Next on the list of audio recorders for Discord is Audacity. It lets you record live sound from a microphone or mixer, or even capture system playback. But, you can only record one audio input source at a time, such as your microphone or system audio, but not both together by default. Still, it supports high sample rates and bit depths, allowing you to record crisp, clear sound from microphones or system audio. Furthermore, you can listen to your voice in real time while recording to check clarity and volume, which is helpful for podcast recordings. Moreover, Audacity includes built-in tools like noise reduction, echo, equalization, and reverb to enhance your recordings. However, another limitation of this Discord audio recorder is that it doesn’t support audio source separation. This means it can’t automatically split different sounds, such as separating voices and background music, from a single recording.
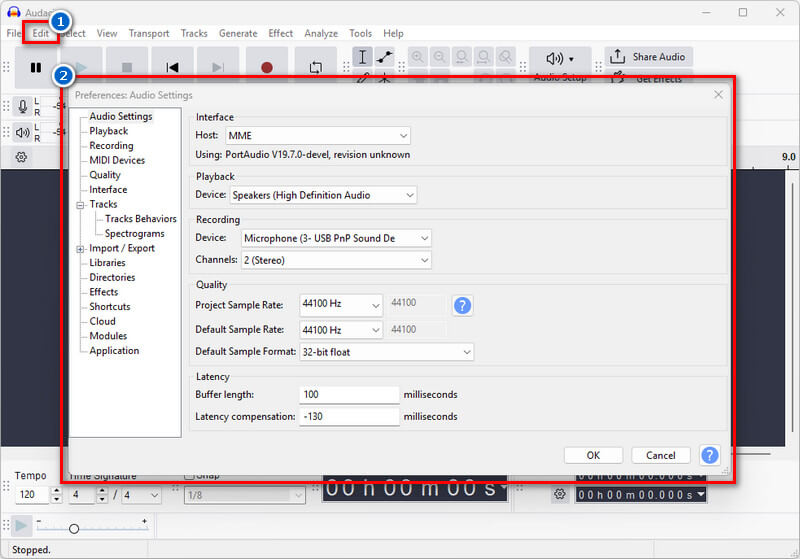
Step 1. Set Up Audio Preferences
Start by installing Audacity on your computer. Once done, set up its audio preferences to your desired settings. Simply go to the “Edit” tab and select “Preferences’ from the menu. Under Devices, choose your preferred microphone for input and speakers or headphones for playback. You can alter the sample rate and bit depth in the “Quality” tab to improve sound quality. Finally, click “OK” to save.
Suppose you prefer to record both the microphone and system sounds on Windows. In that case, you can use the built-in Stereo Mix feature to record both system and microphone audio directly in Audacity. Simply enable Stereo Mix in your sound settings and select it as the input device in Audacity. On Mac, since there’s no built-in option, you need to install a virtual audio driver, such as Soundflower or BlackHole. These tools route internal sound to Audacity, allowing you to record system and mic audio together just like on Windows.
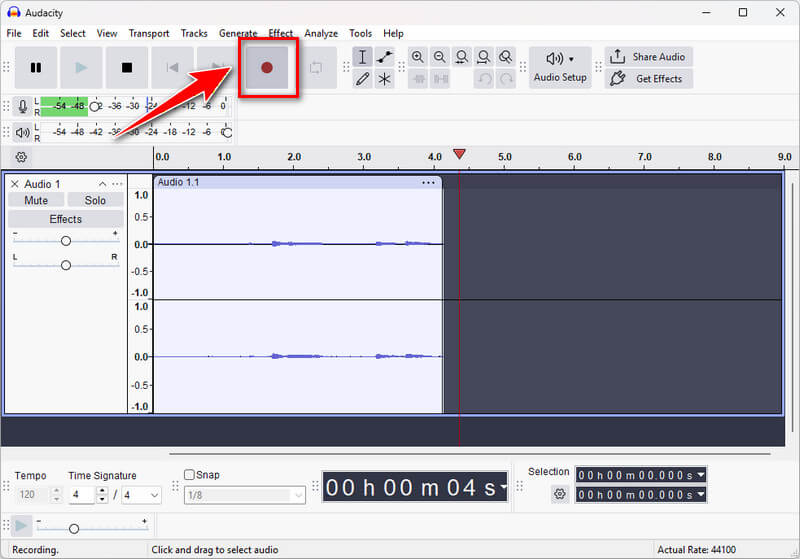
Step 2. Start Recording Discord Audio
Once all set up, launch Discord and join the voice channel or private call you want to record. Then return to Audacity and click the “Record” button to begin recording. You’ll see waveforms appear, showing that both your mic and Discord sound are being recorded.
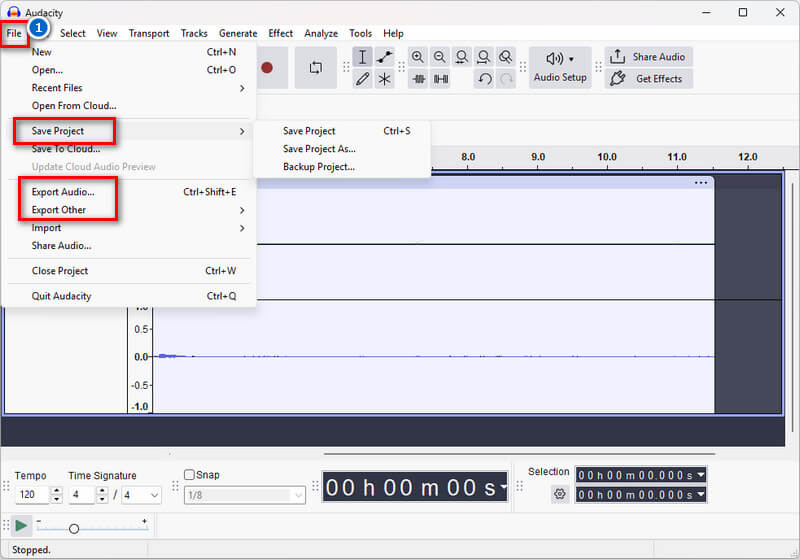
Step 3. Stop and Save the Recording
When the call ends, click “Stop” in Audacity to finish recording. You can also edit unwanted parts, adjust volume, or remove noise using Audacity’s tools. Finally, go to the File menu and select the “Export” option. Then, save your recording as an MP3, WAV, or FLAC file for easy playback and sharing.
How to Record Discord Audio with Online Recorder
For those who don't want a third-party audio recorder with complicated steps, you can try AceThinker Online Free Audio Recorder. It is an online audio recorder compatible with all major browsers, including Google Chrome, Firefox, Microsoft Edge, Opera, and more. Aside from that, it lets you record internal audio and microphone sounds simultaneously on Mac and Windows computers. Plus, it doesn't limit the length of the audio or video you record. Additionally, this online recorder lets you record audio from sources such as online streaming platforms, gaming platforms, and more. Check out the steps provided below.
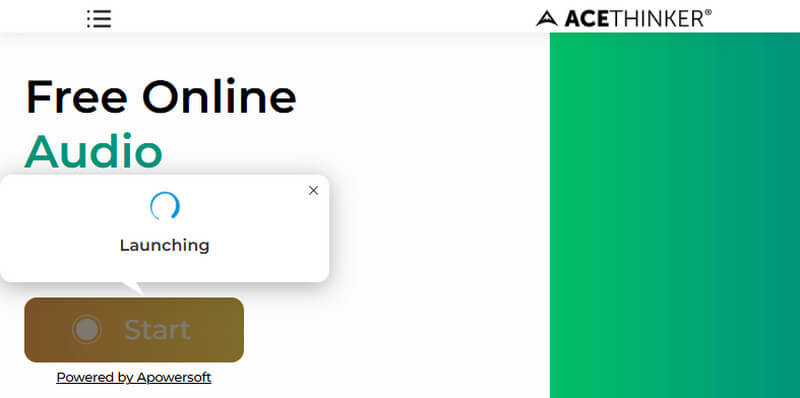
Step 1. Access the Online Recorder
In your web browser, search for Acethinker Online Free Audio Recorder and select it from the search results. Next, download its launcher by clicking the “Start” button, then selecting “Download.” After that, start the installation process, and the tool will launch automatically after installation.
Step 2. Start Discord Audio Recording
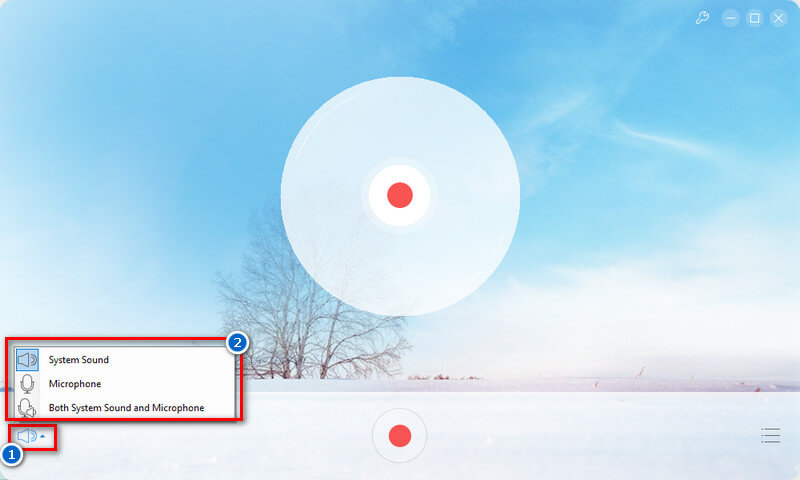
Then open the Discord app and join the channel where you want to record audio. Next, return to the audio recorder and select the audio source by clicking the volume icon dropdown, then choose microphone sound, system audio, or both. Once done, hit the “Record” icon to start recording.
Step 3. Stop the Recorded Audio
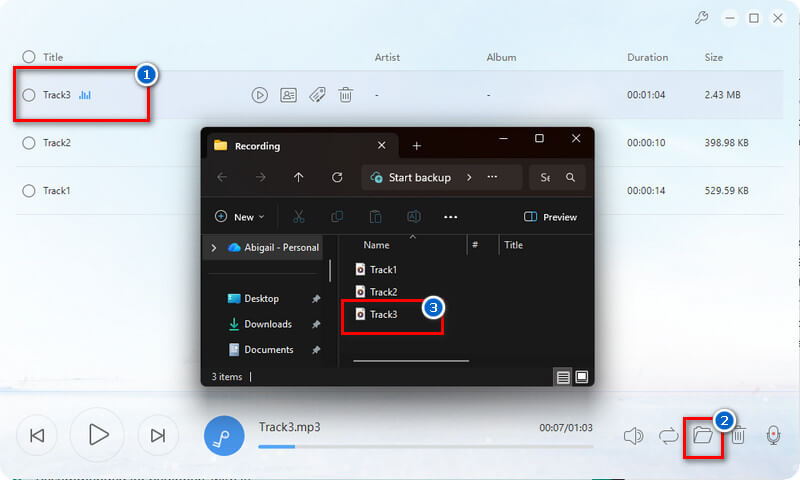
To end the recording, go back to the audio recorder and click the “Stop” icon. Then, click the hamburger icon to see the recorded Discord audio. Here, you can play the audio using its built-in music player. Finally, click the “Folder” icon beside the player to locate the recorded audio.
Frequently Asked Questions
What is Discord?
Discord is a free communication platform that lets people talk through voice, video, or text. It’s popular among gamers, students, and online communities for chatting and sharing media. You can join different servers or groups to meet, chat, and collaborate with others easily.

Does Discord allow audio recording?
Discord doesn’t have a built-in audio recording feature. However, you can use third-party tools or bots, like Craig Bot or recording software, to capture conversations. However, always remember to ask for permission before recording anyone’s voice on Discord.
Is it allowed to record audio conversations on Discord?
Recording Discord audio is legal only if everyone in the conversation agrees. Many countries have privacy laws that require getting consent before recording someone’s voice. To stay safe, always inform participants and get their approval before you start recording.
Conclusion
Recording Discord audio can be very helpful for podcasts, interviews, meetings, or gaming sessions. There are many ways to do it, such as using a bot like Craig, desktop tools like Aqua Demo, OBS Studio, or Audacity, and even online audio recorders. Each audio recording software for Discord offers different features, so you can choose based on your preferences. However, it’s very important to remember that you should always get consent from everyone before recording, to respect their privacy and comply with the rules. Moreover, testing your setup before an important call ensures that the sound is clear and all voices are captured properly. With the right tool and a little preparation, you can easily record and save your Discord conversations safely and effectively for future use.