VLC Media Player is a free tool many people use to play videos and music. It supports many file types and works on Windows, Mac, and Linux devices. But VLC is not just for watching or listening. It can also record audio! This guide will show you how to record audio with VLC from your computer or an external microphone. Whether you want to save a song from a stream, capture a meeting, or record your voice, VLC can help. You don’t need to download extra software, and the steps are easy to follow. In this guide, we’ll walk you through each part of the process so you can confidently start recording audio. Let’s get started and turn VLC into your simple audio recorder!
On This Page
Detailed Guide to Record Audio on Windows and Mac Using VLC
| Ease of Use | Moderate |
| Internet Required | No |
| Advanced Features | Playback and media conversion |
Recording audio with VLC Media Player is simple once you know where to look. Whether using Windows or Mac, lets you capture internal audio and sound from your microphone. In fact, many users also use it to record screen with VLC since the tool supports both video and audio capture. In the steps below, we'll guide you through setting everything up, choosing your audio source, configuring the settings, and starting your recording. Just follow along, and you’ll be saving audio in no time.
Record Streaming Audio with VLC Windows
Step 1. Launch the VLC App
First, open VLC Media Player on your PC. If you don't have it, you can download it on its official website. Then, follow the instructions given to install it successfully. The tool will then automatically open.

Step 2. Enable the Record Button
By default, you can't see the recording buttons on VLC's main interface. To enable them, navigate to the View tab on the toolbar. From there, tick the Advanced Controls option, and the recording button will appear above the playback buttons.

Step 3. Select Capture Device
Next, go to the Media tab and choose the Open Capture Device option. Under the Capture Device tab, set the Capture mode to 'Direct Show.' Then, under Device Selection, set the Video Device Name from 'None' and Audio Device Name to your preferred audio source.

Step 4. Choose Your Output Destination
After setting up Capture Device, click the drop-down next to the Play button and select Convert instead. Then, select an audio codec from the Profile field. Afterward, click the Browse button and choose your destination folder.

Step 5. Start Recording Audio
Once everything is set up, click the Start button from the Convert window to begin the audio recording. Next, click the Red circle icon to start the recording. VLC will now record the audio quietly in the background while it plays.

Step 6. Play the Recorded Audio
Once you're done, click the red circle icon again to stop the recording. Your recorded audio will then be saved to your chosen destination earlier. Finally, locate the file and play it on your PC.

How VLC Media Player Record Audio on Mac
Step 1. Open VLC Media Player
If you already have the app on your Mac, search VLC Media Player in the Applications folder and open it. If not, you can get it on its official website and follow the wizard prompts to finish the installation. Afterward, open the VLC once the installation is done.

Step 2. Select Audio Source
Next, navigate to the File tab from the toolbar and select Open Capture Device from the dropdown menu. In the next window, pick your audio input device from the list in the Audio section (like a Built-in Microphone or BlackHole). If you are recording system sounds, make sure BlackHole is selected; if you are recording your voice, choose your Microphone.

Step 3. Start VLC Record Audio Stream
After confirming all settings, click the Open button in the window. Then, navigate to the Playback tab and click the Record option to start the recording. Once you’re done recording, hit the Stop button at the VLC window to end the audio capture process.

Step 4. Find your Recorded Audio
VLC saves your recorded audio in the Music folder by default. You can open the Music folder in Finder and locate it in the left-hand corner. The VLC recorded audio is named vlc-record-date-time.format, which includes the date and time of the recording.

Alternative Way to Record Audio on Your Windows and Mac
Although VLC can record audio, it isn't easy for everyone, especially beginners. So, we found an alternative way to record internet audio on your computer using various tools.
1. AceThinker Online Audio Recorder
| Ease of Use | Very Easy |
| Internet Required | Yes |
| Advanced Features | Unlimited recording time, free usage |
The first tool we tried is AceThinker Online Audio Recorder. It is a browser-based recorder accessible on any browser, such as Opera, Mozilla Firefox, Microsoft Edge, and Google Chrome. Although it is web-based, it can record your internal audio and even your microphone individually or simultaneously compared to a VLC audio recorder, which is perfect for any kind of recording, such as music, tutorials, podcasts, and online meetings. Apart from that, this tool can also allow you to do unlimited audio recordings for free without a time limit. More than that, AceThinker ensures that your recording is high-quality, maintained, and sounds professional. However, since it operates through the browser, you need a stable internet connection to start using it.
Step 1. Get the Audio Recorder Launcher
First, we must visit the official AceThinker Online Recorder page. You can do this by clicking its name above to be there without searching for it. From there, click the Start button to get its launcher. If you are a first-time user, it will prompt you to download a small file for the tool to work properly. Just follow the installation guide until you have completely installed the launcher.

Step 2. Select Your Desired Audio Source
After installing the launcher, it will automatically open on your computer. From there, you can choose what audio source you want to record. You can record the system sound or microphone audio only or both at the same time. Simply navigate to the lower left corner and click the volume icon there.

Step 3. Start Recording Your Audio
Suppose you are ready to record the audio on your computer; just click the red circle button to start. Then, play the streaming audio you want to capture and start speaking if you also set it to record your microphone. You can pause the recording anytime and continue recording once again.

Step 4. Stop and Play the Recorded Audio
Once you are done recording the audio, click the Stop button to finalize your recording. After that, you can see the recorded file on your playlists by clicking the 3-horizontal lines on the lower-right corner. From there, you can play the audio to preview or rename it.

2. Aqua Demo
| Ease of Use | Easy |
| Internet Required | No |
| Advanced Features | Scheduled recording, noise reduction |
VLC is a reliable choice for media playback and recording. Still, the Aqua Demo could be worth considering if you want a simpler setup and smoother experience. Unlike VLC, Aqua Demo streamlines video and audio recording without additional plugins. It offers an easy-to-use interface and basic editing tools, making it a good option for users who want a straightforward recording solution. Furthermore, this screen recording tool has various recorders, such as game, screen, and audio recorders, making it an all-in-one solution for any user. Besides, the tool supports high-quality output audio formats such as MP3, M4A, WMA, AAC, FLAC, and WAV. More than that, unlike VLC, Aqua Demo provides noise cancellation and microphone enhancement, which is useful when recording audio. On top of that, you can use this software in any recording activities, like recording audio for your YouTube video, online meeting, or any audio-related activities. However, Aqua Demo is mainly available on Mac and Windows compared to VLC, which is available on several desktop and mobile operating systems.
Step 1. Install VLC Audio Recorder Alternative
To start, you need to download and install Aqua Demo on your computer. To do this, visit the application's official website or click on the download button above. After that, run the .exe file to initiate the installation process. Once done, start the Aqua Demo on your computer.

Step 2. Configure System Sound Settings
After launching the app, change the video recorder to an audio recorder on the main interface. Then, go to the Settings pane and start configuring the audio settings to your preference. You can modify the audio source, output format, channel, sample rate, and more based on your needs. Once done, click OK to save all the changes you've made.

Step 3. Start Capturing Audio
Next, enable System Sound or Microphone based on the audio source you want to capture. When ready, click the big red circle REC button to start recording audio. After recording, click the Stop button on the toolbar to end the process.

Step 4. Play the Recorded Audio
After recording, a new window will appear on your desktop showing all of your recorded audio. You can also use the tool's trimming feature to remove excess audio. Additionally, the recorded audio is automatically saved on your computer.

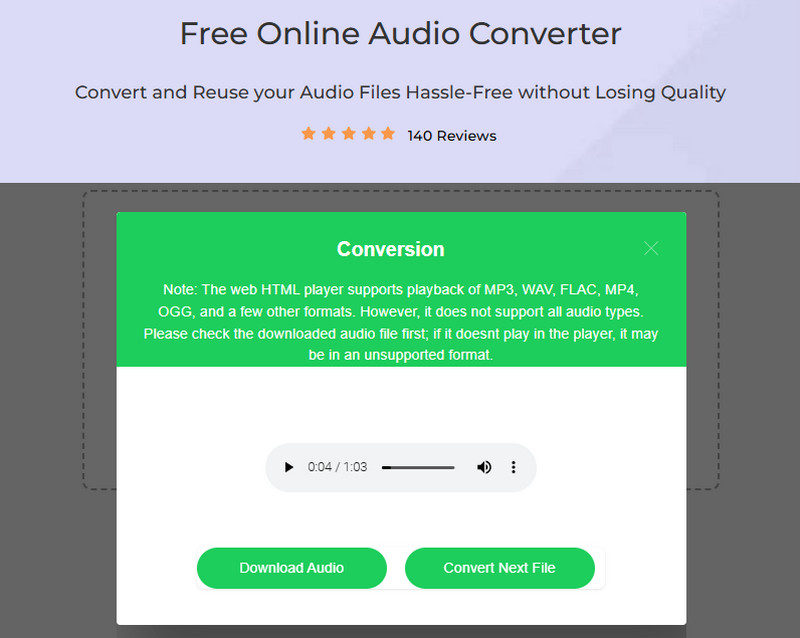
Extra Tip: How to Convert the Recorded Audio
If you want to convert the recorded audio with VLC into another format, use this Free Online Audio Converter by AceThinker. It is an online-based audio converter that works on popular browsers like Safari, Opera, Chrome, Edge, and Firefox. Besides, it supports various audio formats, including MP3, WMA, AAC, WAV, FLAC, M4A, and many more. Also, this converter ensures that the converted file maintains the same audio quality as the original file, meaning if the original file has high-quality audio, the converted file will also have high-quality audio. Furthermore, the online tool ensures that all your converted files are safe and secure to download, and they will be removed automatically after converting.
User Guide:
- First, open a browser and search for this audio converter. Alternatively, you can visit it by clicking its name above. Then, you’ll be greeted by a clean, user-friendly interface.
- Next, click the Choose Your File button on your screen to import the recorded audio. When the audio is uploaded, choose the desired output format and click the Select Format button below.
- The tool will then automatically start the conversion process and wait until it’s finished. Once done, you can play the recorded audio using its HTML player or click the Download Audio button below to save it on your computer.
Frequently Asked Questions
Can VLC record internal audio?
VLC can record internal audio, but it requires a specific setup. On Windows, you may need to use third-party software like VB-Audio Cable to capture internal audio. You'll need tools like BlackHole to record system audio on macOS, as VLC cannot do this directly.

Why is VLC not recording audio?
VLC might not record audio if it doesn't have the right input source set or lacks permissions for your microphone or system audio. Ensure that your device's audio settings are correctly configured, and check VLC's capture settings. Updating VLC or reinstalling might also fix issues caused by bugs or missing components.
Is VLC still safe to use?
VLC is still safe to use as it's open-source, well-maintained software. Regular updates ensure it stays secure and is trusted by millions globally. However, downloading it from the official website is always a good idea to avoid any potential risks from third-party sources.
Conclusion
In conclusion, VLC is a versatile and free tool that makes audio recording easy for anyone. It lets you record system sounds and microphone input with simple setup steps for Windows and Mac users. While VLC is great for basic audio capture, we recommend exploring Aqua Demo for a more advanced, user-friendly experience with additional features like noise cancellation and a smoother interface. Both tools offer excellent options for casual use or professional recording needs.
You are allowed to record computer sound and microphone voice as well as the desktop screen with this screen and audio recorder.