NVIDIA ShadowPlay, a.k.a. NVIDIA Share, is a recording software that lets gamers easily record and share their gameplay. It's part of the GeForce Experience software, designed to capture high-quality videos, screenshots, and livestreams. One of the key features that make ShadowPlay so convenient is the use of hotkeys. Hotkeys are keyboard shortcuts that let you start, stop, and save recordings instantly without interrupting your game. This means you can capture your best moments seamlessly without pausing or navigating through menus. Additionally, using hotkeys makes your recording process much more efficient and enjoyable, ensuring you never miss a highlight or a crucial moment in your gameplay. That's why this post teaches you about the NVIDIA recording hotkey shortcuts, their functions, and how to access them easily.
| Solution | Brief Information |
|---|---|
| Different Types of NVIDIA Hotkeys | NVIDIA recording hotkeys overview Learn More |
| Steps in Accessing and Customizing NVIDIA Hotkeys | Detailed steps on accessing and customizing hotkeys Learn More |
| Best Alternative Screen Recording Tool for NVIDIA | Aqua Demo is a screen recording tool that can also record gameplay Learn More |
| Frequently Asked Questions | Frequently asked questions about NVIDIA recording software Learn More |
| Conclusion | Final thoughts about NVIDIA keyboard shortcuts Learn More |
Different Types of NVIDIA Hotkeys
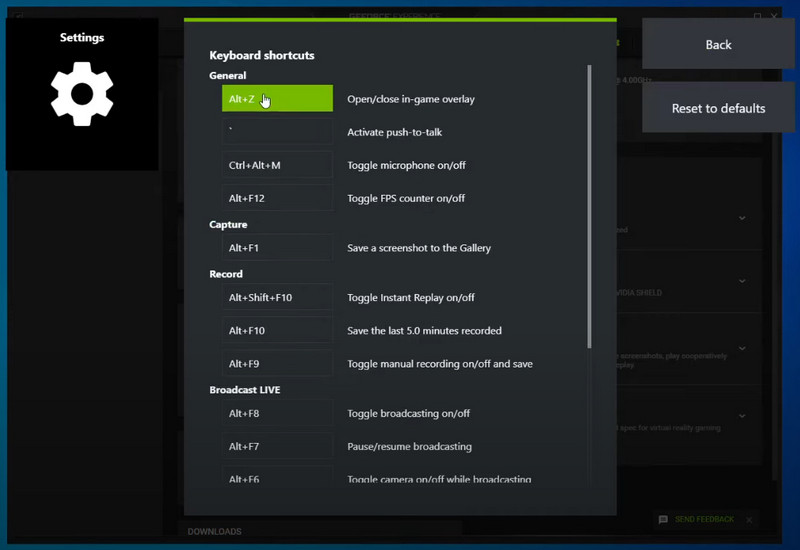
NVIDIA Shadowplay has different types of keyboard shortcuts or hotkeys. They can be used for various purposes, such as recording gameplay, capturing screenshots, and toggling performance overlays. Additionally, these keyboard shortcuts are helpful for users, especially gamers, so they can quickly record their game without disrupting their gameplay. Furthermore, the table below shows different types of NVIDIA ShadowPlay hotkey shortcuts and their corresponding functions.
| Hotkey | Function |
|---|---|
| ‘ | Activate push-to-talk |
| Alt + Z | Open/Close GeForce Experience overlay |
| Alt + F9 | Start/Stop manual recording |
| Alt + F10 | Save the last recorded minutes (Instant Replay) |
| Alt + F1 | Capture a screenshot and save to Gallery |
| Alt + F8 | Start/Stop broadcasting to Twitch, Facebook Live, or YouTube Live |
| Alt + F12 | Toggle FPS counter on/off |
| Alt + F7 | Pause and resume broadcasting |
| Alt + F6 | Toggle camera on and off while broadcasting |
| Alt + F5 | Toggle custom overlay on and off while broadcasting |
| Alt + F3 | Open the Freestyle game filter overlay |
| Alt + Shift + F10 | Toggle instant replay on/off |
| Ctrl + Alt + M | Toggle microphone on/off |
Steps in Accessing and Customizing NVIDIA Hotkeys
After knowing the different types of NVIDIA Shadowplay hotkeys, the next step is to access and customize them. Besides, customizing hotkeys depending on your preferences can help you enhance your overall gaming experience when you set up NVIDIA recording. Here's a simple guide to accessing and customizing your NVIDIA ShadowPlay shortcut hotkeys.
Step 1. Open GeForce Experience and Access Settings
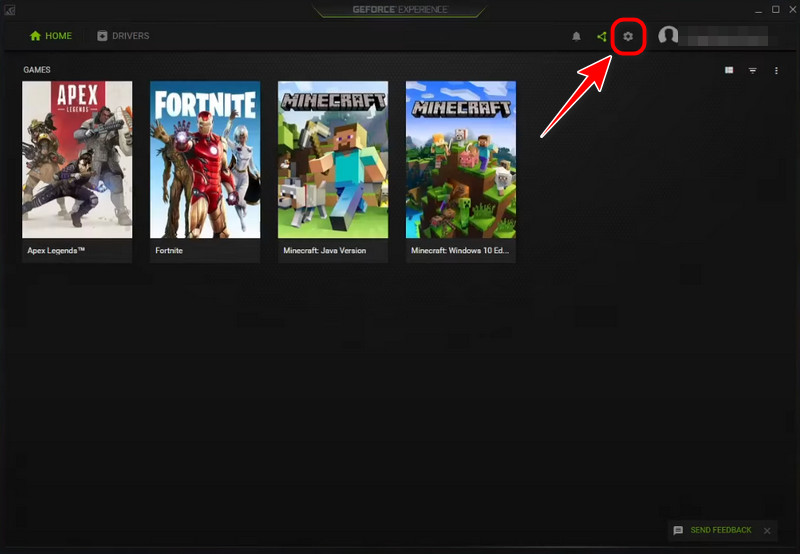
If you don't have the software yet, you can download it from NVIDIA's official website. Then, launch the GeForce Experience software on your computer. Next, click on the gear icon at the top-right corner to open the settings menu.
Step 2. Navigate to the Hotkey Settings
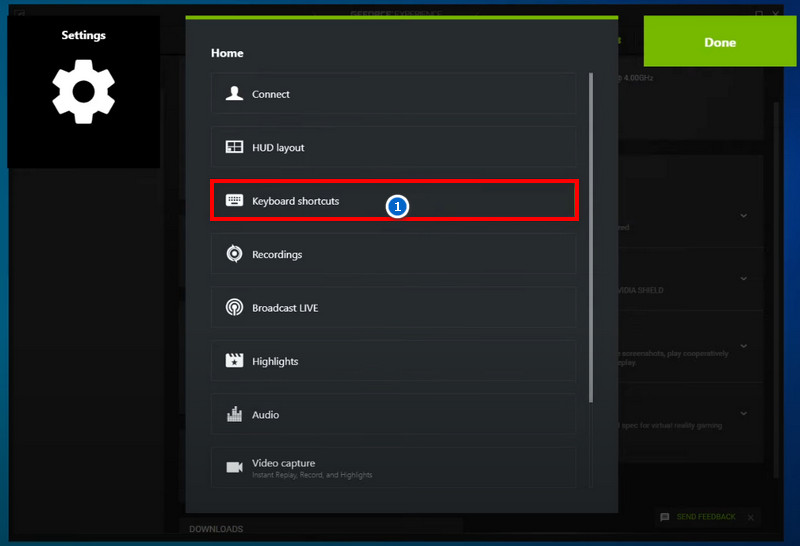
In the settings menu, click the "In-Game Overlay" tab on the left side. Next, click the Settings button under the In-Game Overlay section, and the new window will open. Afterward, select "Keyboard Shortcuts" from there to view all the default hotkeys available for ShadowPlay functions.
Step 3. Customize Hotkeys and Save Changes
Here, you can change any default hotkeys to your preferred ones. Just click on the keyboard shortcut you want to change and press the new key combination you want to assign. Next, after customizing all the desired hotkeys, click "Done" to apply and save your changes.
Best Alternative Screen Recording Tool for NVIDIA
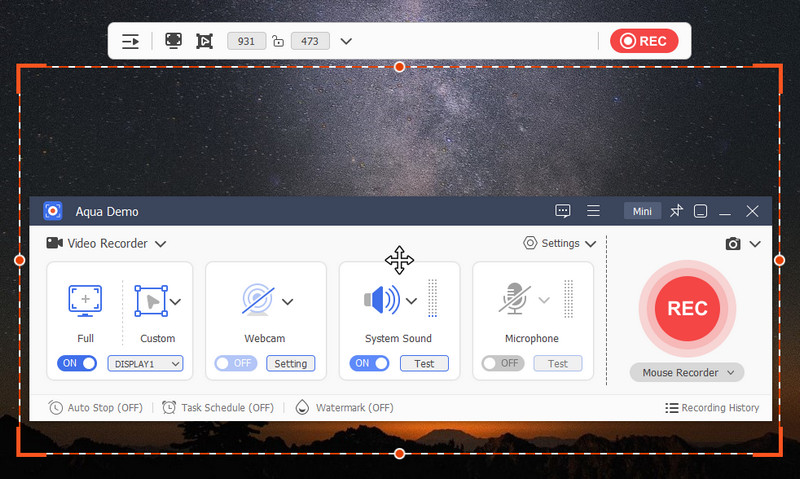
If you think NVIDIA is quite hard to use since you are a beginner, why don’t you try the Aqua Demo? This tool is also one of the most popular and reliable screen recording tools you can opt for. Also, it allows you to record any activity on your computer screen, including gameplays, tutorials, videos, and more. Additionally, it provides high-quality recording up to 4K resolution with 60 FPS, ensuring a clear recording. Besides, it lets you simultaneously capture PC screen with internal audio and microphone as well as webcam overlay. Furthermore, you can also enjoy its additional features, such as a task scheduler, screenshots, on-screen annotations, and more. Moreover, you can see the guide below to see how easy Aqua Demo is.
Step 1. Launch the Screen Recorder
To begin with, download and install the Aqua Demo on your computer. You can tap the download button above or visit AceThinker’s official website to learn more about the tool. Once downloaded, follow the prompts to proceed to the installation process. The tool will launch automatically after installation.
Step 2. Customize Aqua Demo’s Settings
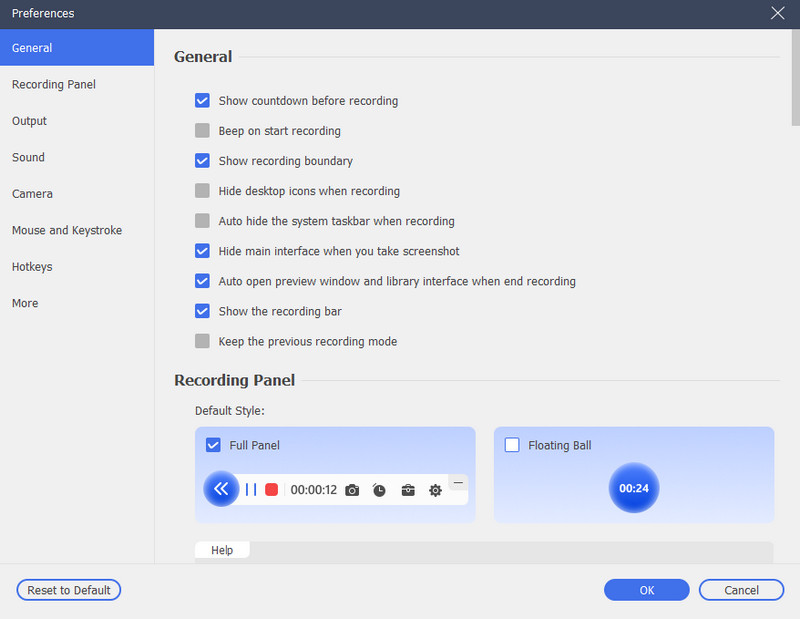
On its interface, navigate to Settings at the top-right corner and click Record Settings on the list. Then, the Recording menu will appear on your screen. From there, you can modify the recording settings to your preference. You can also see and customize its hotkeys. Afterward, click the OK option to save the changes.
Step 3. Start Recording Gameplay
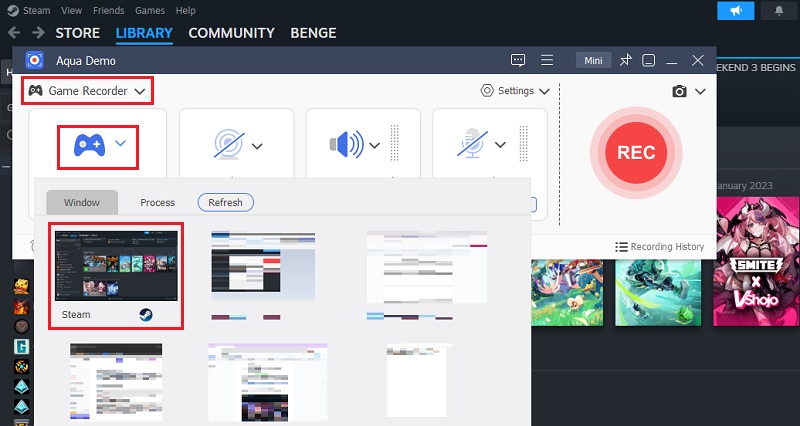
After modifying its settings, tap the Video Recorder and change it to Gameplay Recorder. Then, follow the prompt pop-ups on your screen to enable the Gameplay recorder. After that, click the REC button to initiate the recording process.
Step 4. Playback the Recorded Gameplay
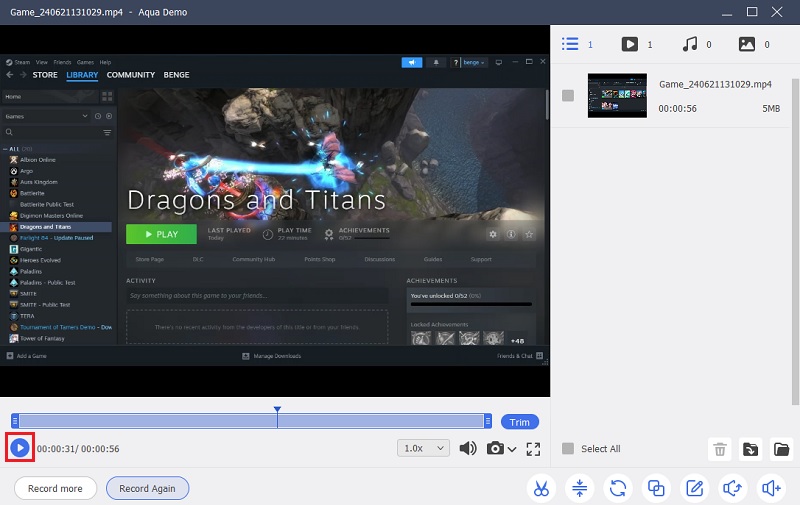
Once the gameplay is done, click the Stop button, and the preview tab will appear. From there, you can playback the recorded gameplay and trim it if you want to. Also, the recorded file automatically saves on the folder you set earlier. Finally, you can share your gameplay with your friends.
Frequently Asked Questions
Can I use NVIDIA ShadowPlay without GeForce Experience?
Yes, you can use NVIDIA ShadowPlay without GeForce Experience. It is now available as a separate download. Once installed, you can use ShadowPlay features without having GeForce Experience running.

How do I record the last 5 minutes of gameplay?
To record the last 5 minutes of gameplay using NVIDIA ShadowPlay, you can use the "Instant Replay" feature. You can enable it in settings and set a specific duration (5 minutes) for the instant replay buffer. Then, when you want to save the last 5 minutes of gameplay, you can use the "Alt + F10" hotkey to trigger the instant replay and save the recording.

What's the hotkey to start streaming with NVIDIA?
The default hotkey to start streaming with NVIDIA ShadowPlay is Alt + F8. Pressing this hotkey during gameplay will start the streaming feature, allowing you to broadcast your gameplay to your preferred streaming platform. Also, remember that you can customize the hotkey in the ShadowPlay settings if needed.

Conclusion
NVIDIA game recorder shortcuts are essential for any gamer who wants to effortlessly capture and share their best moments. `Alt + F9` for starting and stopping recordings, `Alt + F10` for saving instant replays, and `Alt + F1` for capturing screenshots are only a few of NVIDIA's hotkeys. Additionally, acquiring these keyboard shortcuts makes the process seamless and efficient without interrupting your gameplay. Furthermore, customizing these hotkeys allows you to tailor your recording setup to fit your workflow and preferences. Besides, don't hesitate to experiment with different configurations to find what works best for you. Overall, with NVIDIA ShadowPlay's flexible hotkeys, you can enhance your gaming experience and ensure you never miss a crucial moment in your gameplay.


